A virus is generally considered a bad thing, whether it affects humans, computers, or plants. However, there was a strange time in history when a virus actually turned into something beautiful—specifically in the 17th-century Netherlands!
Tulips were a massive deal in the country back then, sparking a phenomenon historians call “Tulip Mania.” Suddenly, a virus infection broke out among the flowers, creating blooms that had beautiful, flamed, and variegated color patterns. Today, these “infected” flowers are quite rare and historically significant, often named after the master artist, Rembrandt.
While we might not see those rare 17th-century bulbs in our gardens today, the tulip remains one of the world’s most beloved symbols of spring. With National Tulip Day celebrated on May 13th (and various tulip festivals happening globally throughout spring), it is the perfect time to celebrate these cup-shaped beauties.
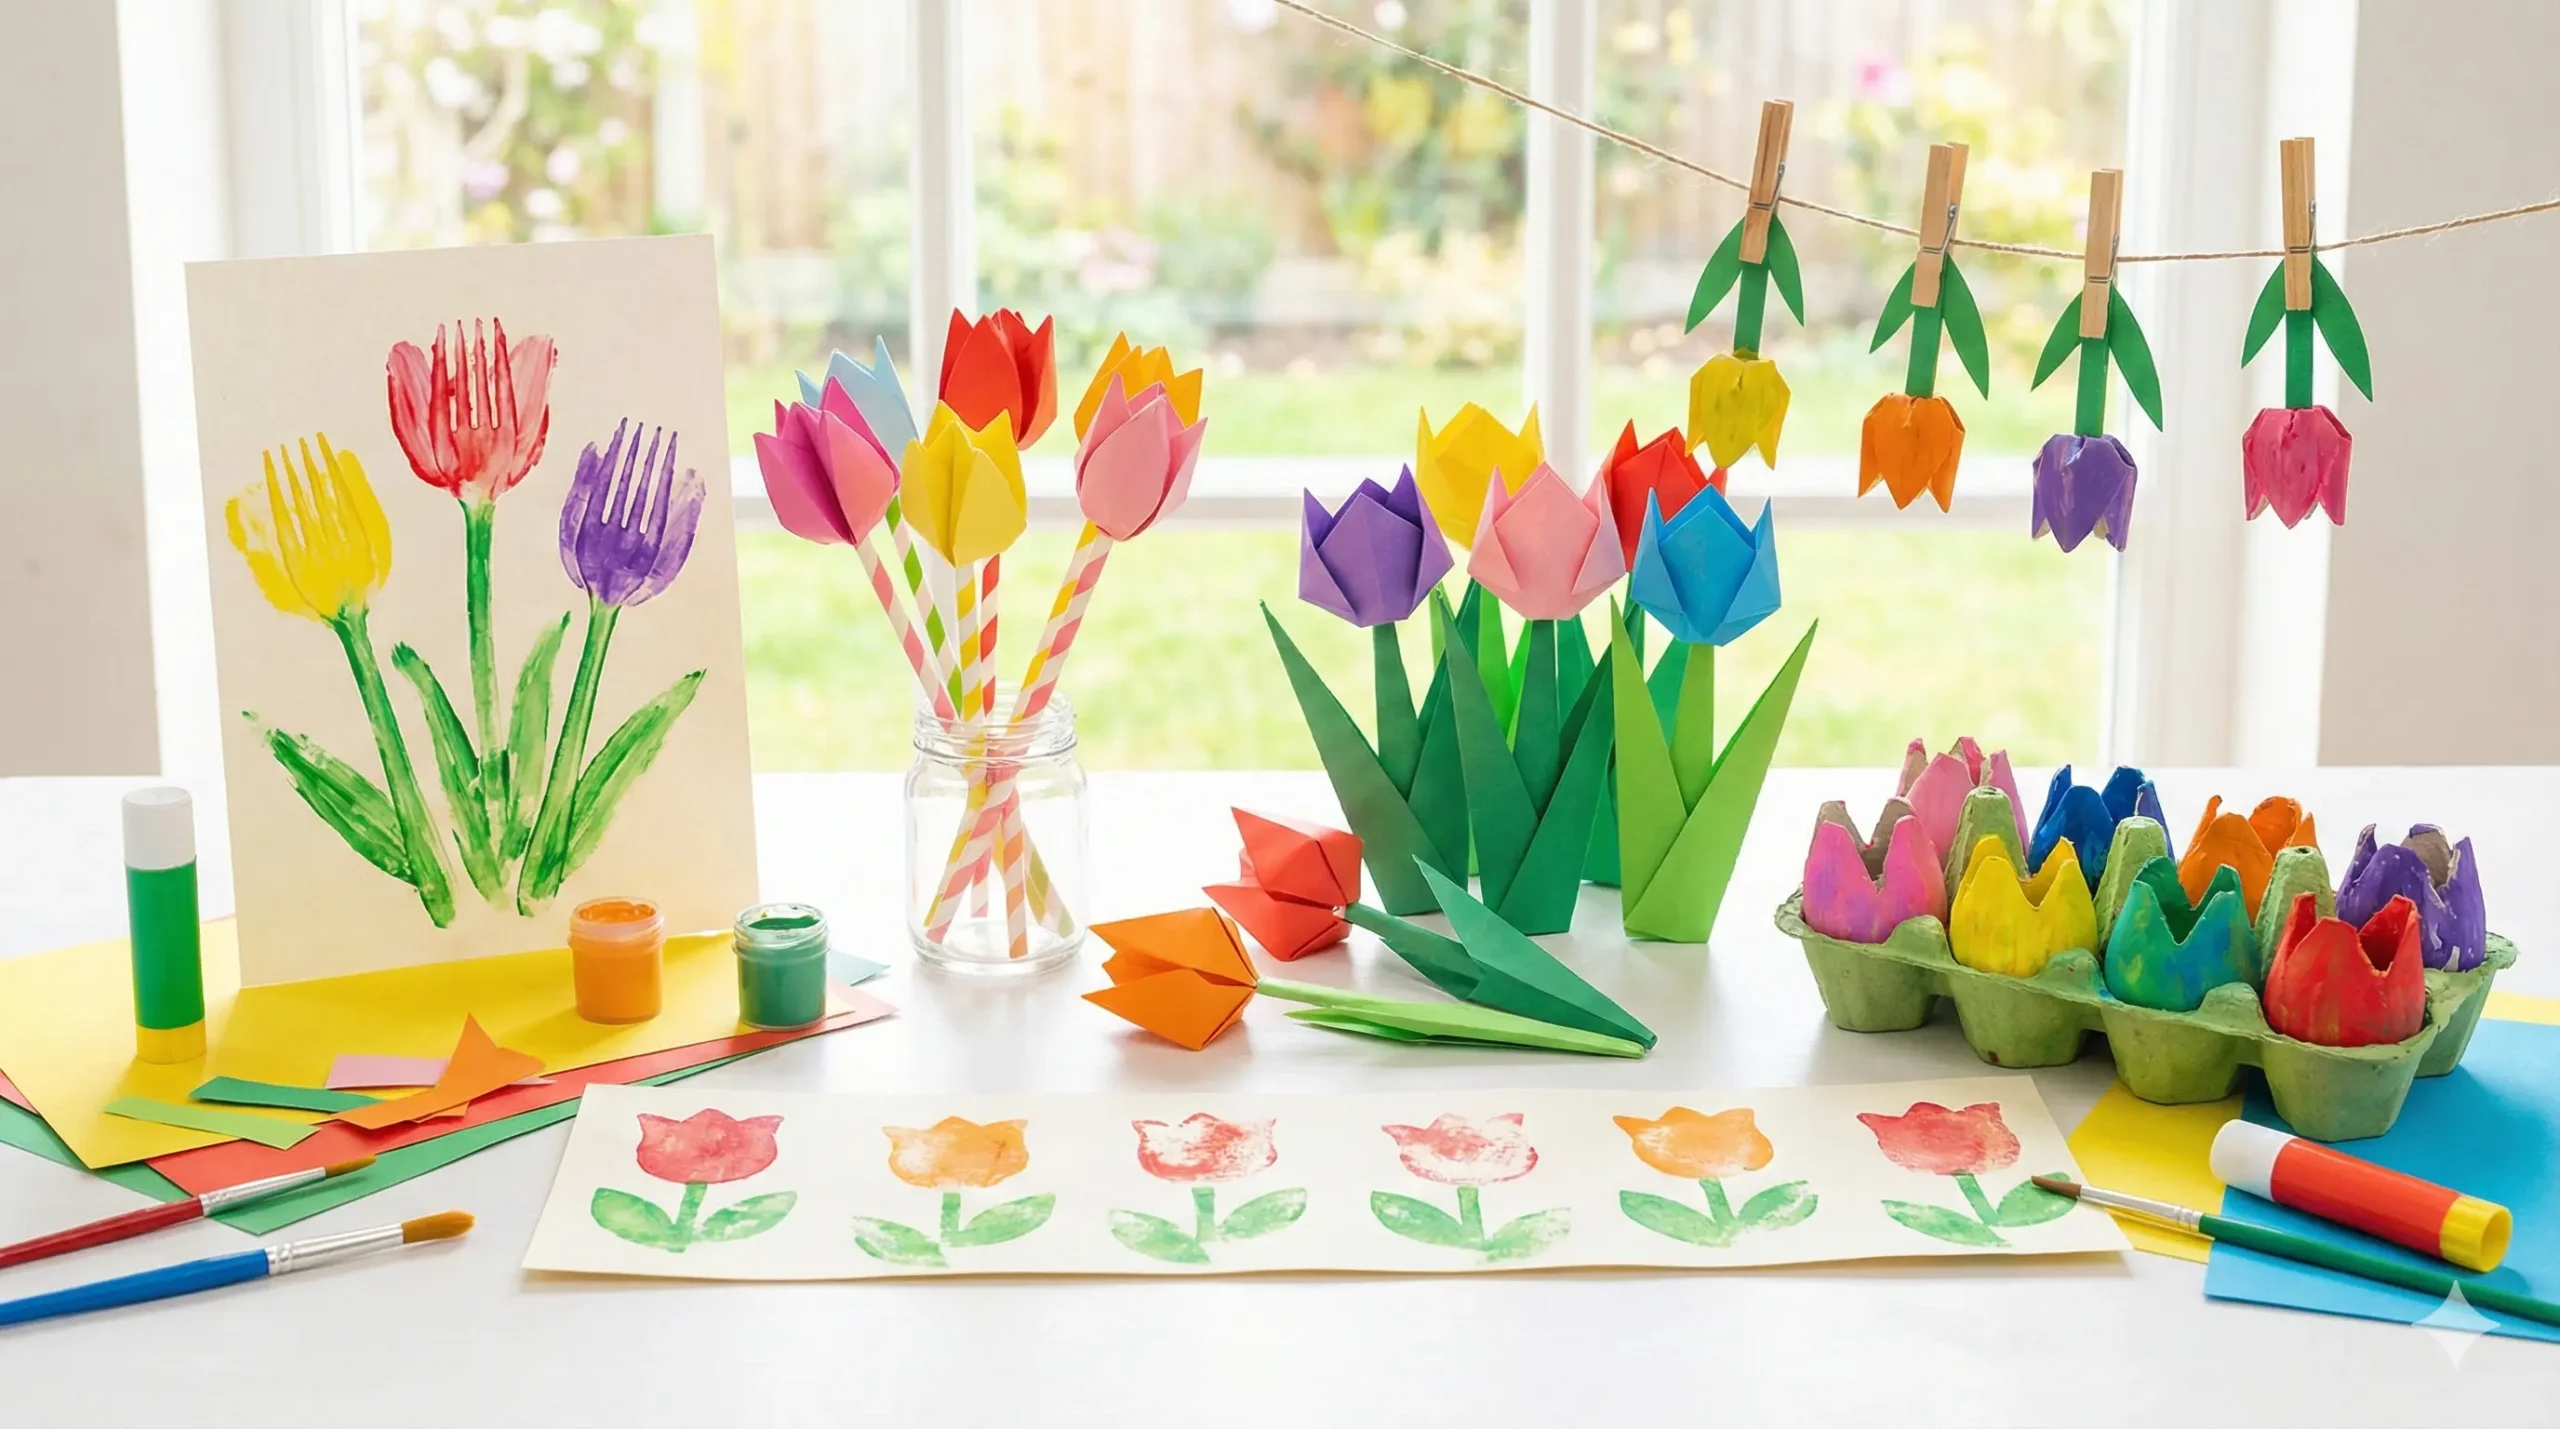
We have curated 15 bright and colorful tulip crafts for kids of all ages. From simple potato stamps for toddlers to intricate paper folding for older kids, these projects are perfect for classroom activities, Mother’s Day gifts, or just a sunny afternoon at home.
Fun Facts About Tulips to Share While Crafting
Before you get out the glue sticks, here are a few fun facts to share with your children to make the activity educational:
- They Follow the Sun: Tulips are “heliotropic,” meaning they move their heads to follow the sun across the sky.
- Not Just Dutch: While we associate them with the Netherlands, tulips actually originated in Central Asia and Turkey.
- Edible Petals: During World War II, when food was scarce, people in Europe famously ate tulip bulbs. The petals are actually edible and can be used in salads!
15 Creative Tulip Crafts for Kids
1. The Classic Fork Print Tulip
This is a classic “process art” activity, meaning it focuses on the fun of making art rather than perfection. It is perfect for toddlers.
- What You Need: A plastic fork, acrylic paints (red, yellow, purple), green paint, a paintbrush, white paper.
- How to Make It: Squeeze a blob of colored paint onto a paper plate. Dip the back of the fork into the paint and press it onto the paper. The tines of the fork create the texture of the tulip petals! Use the paintbrush to draw a simple green stem and leaves at the bottom.
2. 3D Paper Straw Tulips
These stand up on their own and make a great centerpiece for a spring dinner.
- What You Need: Green paper straws, colored cardstock (pink, red, yellow), a hole punch, scissors.
- How to Make It: Cut a four-petaled flower shape out of the cardstock. Punch a hole directly in the center. Push the green straw through the hole. Fold the petals upward and secure them with a tiny dot of glue or tape so they cup around the straw. Add green paper leaves to the straw stem.
3. Origami Tulip Marker
Origami is fantastic for developing fine motor skills and spatial awareness.
- What You Need: Square origami paper (6×6 inches), green marker.
- How to Make It:
- Fold the square in half diagonally to make a triangle.
- Fold the right corner up, but not all the way to the middle—angle it slightly outward.
- Do the same with the left corner.
- Flip the paper over and fold the sharp bottom point up slightly to flatten the base.
- Flip it back over, and you have a tulip head! Glue it onto a card and draw a stem.
4. Potato Stamp Field
If you have a potato that is past its prime, turn it into a stamp!
- What You Need: A potato, a knife (adult use only), paints, paper.
- How to Make It: Cut the potato in half. Carefully cut two notches into the top of the flat side of the potato to create a “W” shape (the top of the tulip). Dip the potato in paint and stamp a whole field of flowers across a large sheet of paper.
5. Egg Carton Upcycled Tulips
Teach children about recycling by turning trash into treasure.
- What You Need: Cardboard egg carton, scissors, paint, green pipe cleaners, pom-poms (optional).
- How to Make It: Cut out the individual cups from an egg carton. Trim the edges so they are rounded like petals. Paint them bright spring colors. Poke a hole in the bottom and thread a green pipe cleaner through for the stem. You can glue a yellow pom-pom inside for the pollen.
6. Cotton Pad Watercolors
This craft uses the absorbency of cotton pads to create a beautiful tie-dye effect.
- What You Need: Round cotton makeup pads, liquid watercolors or food coloring, droppers/pipettes, green pipe cleaners.
- How to Make It: Let the kids use droppers to drip different colors onto the cotton pads. Watch the colors blend! Let them dry completely. Once dry, wrap the bottom of the pad around a green pipe cleaner and twist the cleaner to secure it. Fluff out the top to look like a blooming flower.
7. Handprint Tulip Bouquet
A messy but memorable keepsake, perfect for Mother’s Day.
- What You Need: Washable paint, large paper, green marker.
- How to Make It: Paint your child’s hand a bright color (like purple). Have them press their hand onto the paper with their fingers closed (or slightly open). The handprint forms the flower bloom. Repeat this several times. Draw green stems connecting all the handprints and tie them with a painted “bow.”
8. Felt Pencil Toppers
A great introduction to sewing for older kids (7+), or a glue project for younger ones.
- What You Need: Colored felt scraps, embroidery thread, needle, glue.
- How to Make It: Cut two identical tulip shapes out of felt. Place a pencil between them. Sew around the edge using a running stitch, trapping the pencil inside. If you want a no-sew version, simply use strong fabric glue to sandwich the pencil between the felt pieces.
9. Cupcake Liner Flowers
Probably the easiest craft on this list, requiring very little prep.
- What You Need: Colorful cupcake liners, green popsicle sticks, glue, buttons.
- How to Make It: Flatten a cupcake liner. Glue a colorful button in the center. Glue the green popsicle stick to the back. For a “layered” look, glue a smaller cupcake liner inside a larger one before adding the button.
10. Toilet Roll Stamp Tulips
Another upcycling project using items found in every home.
- What You Need: Empty toilet paper roll, paint, paper.
- How to Make It: This is different from the potato stamp because it creates an outline. Pinch the top of the toilet paper roll so it forms a heart or teardrop shape (resembling a tulip bud). Dip the end of the roll into paint and stamp outlines onto paper. Kids can then color inside the lines.
11. Yarn-Wrapped Cardboard Tulips
Great for keeping little hands busy and strengthening grip.
- What You Need: Cardboard cut into tulip shapes, multi-colored yarn, tape.
- How to Make It: Cut a tulip shape out of thick cardboard. Tape the end of a piece of yarn to the back. Have the child wrap the yarn around and around the cardboard shape until the cardboard is completely hidden. The result is a soft, textured flower.
12. Wooden Clothespin Garden
These cute clips can be used to display photos or artwork.
- What You Need: Wooden clothespins, paint, green cardstock.
- How to Make It: Paint the wooden clothespin green (this is the stem). Cut a tulip flower shape out of red or yellow cardstock. Glue the flower to the top of the “pinching” part of the clothespin. Cut leaves out of green paper and glue them to the side.
13. Tissue Paper Suncatchers
Let the spring sunshine into your home with these translucent crafts.
- What You Need: Clear contact paper (sticky back plastic), tissue paper cut into small squares, black construction paper.
- How to Make It: Cut a tulip outline (the frame) out of black paper. Place it on the sticky side of the contact paper. Have the child fill the inside of the frame with colorful tissue paper squares. Seal it with another sheet of contact paper, cut it out, and tape it to the window.
14. 3D Pop-Up Card
A greeting card with a surprise inside.
- What You Need: Cardstock, scissors, glue.
- How to Make It: Cut four identical tulip shapes. Fold them all in half vertically. Glue the right side of the first tulip to the left side of the second tulip. Continue until all four are glued together. Glue the remaining open sides to the inside of a folded card. When the card opens, the tulip “pops” out in 3D honeycomb style.
15. The Tulip Corner Bookmark
Encourage reading with a floral page marker.
- What You Need: Square paper, glue, scissors.
- How to Make It: Make a standard origami corner bookmark base. Then, cut out a separate tulip shape from colored paper. Glue the tulip onto the triangle flap of the bookmark. Add green leaves to the bottom edge. Now, when you mark your page, a little flower will peek out from the corner of your book!
Conclusion: Let Creativity Bloom
Spring is a season of renewal, color, and joy. These crafts are designed not just to keep children occupied, but to help them appreciate the changing seasons and the beauty of nature.
Whether you are celebrating Tulip Day, preparing for Mother’s Day, or simply looking to brighten up a rainy afternoon, these 15 tulip crafts offer something for everyone. From the sensory experience of finger painting to the structural challenge of building 3D flowers, there is a whole garden of creativity waiting to be planted.