Have you noticed something special about the younger generation? Kids today seem to be born with an innate awareness of the world around them. Whether it’s worrying about plastic in the ocean, the importance of trees, or the safety of animals, their empathy for the environment is truly heartwarming. It feels like there is genuine hope for the future!
This eco-consciousness is partly due to the fantastic work schools are doing to educate children about conservation and waste reduction. But the learning doesn’t have to stop at the classroom door. As parents and caregivers, we have a golden opportunity to join this conversation and make sustainability a part of our daily lives.
With National Upcycling Day approaching on June 24th, there is no better time to dive into the world of creative reuse. But before we get out the glue sticks and glitter, let’s clarify exactly what we are doing.
Recycling vs. Upcycling: What’s the Difference?
While the terms are often used interchangeably, there is a distinct difference that is great to teach children:
- Recycling usually involves breaking down waste materials (like melting down plastic bottles or pulping paper) to create raw materials for something entirely new. It’s an industrial process.
- Upcycling, on the other hand, is a creative process. It involves taking an existing item—trash, waste, or unwanted objects—and transforming it into something of higher quality or value than the original.
Upcycling is perfect for children because it teaches them to look at an object and see its potential, not just its current state. It boosts creativity, problem-solving skills, and fine motor development.
Here are 15 creative upcycled crafts for kids that turn everyday household items into beautiful, functional, and fun treasures.
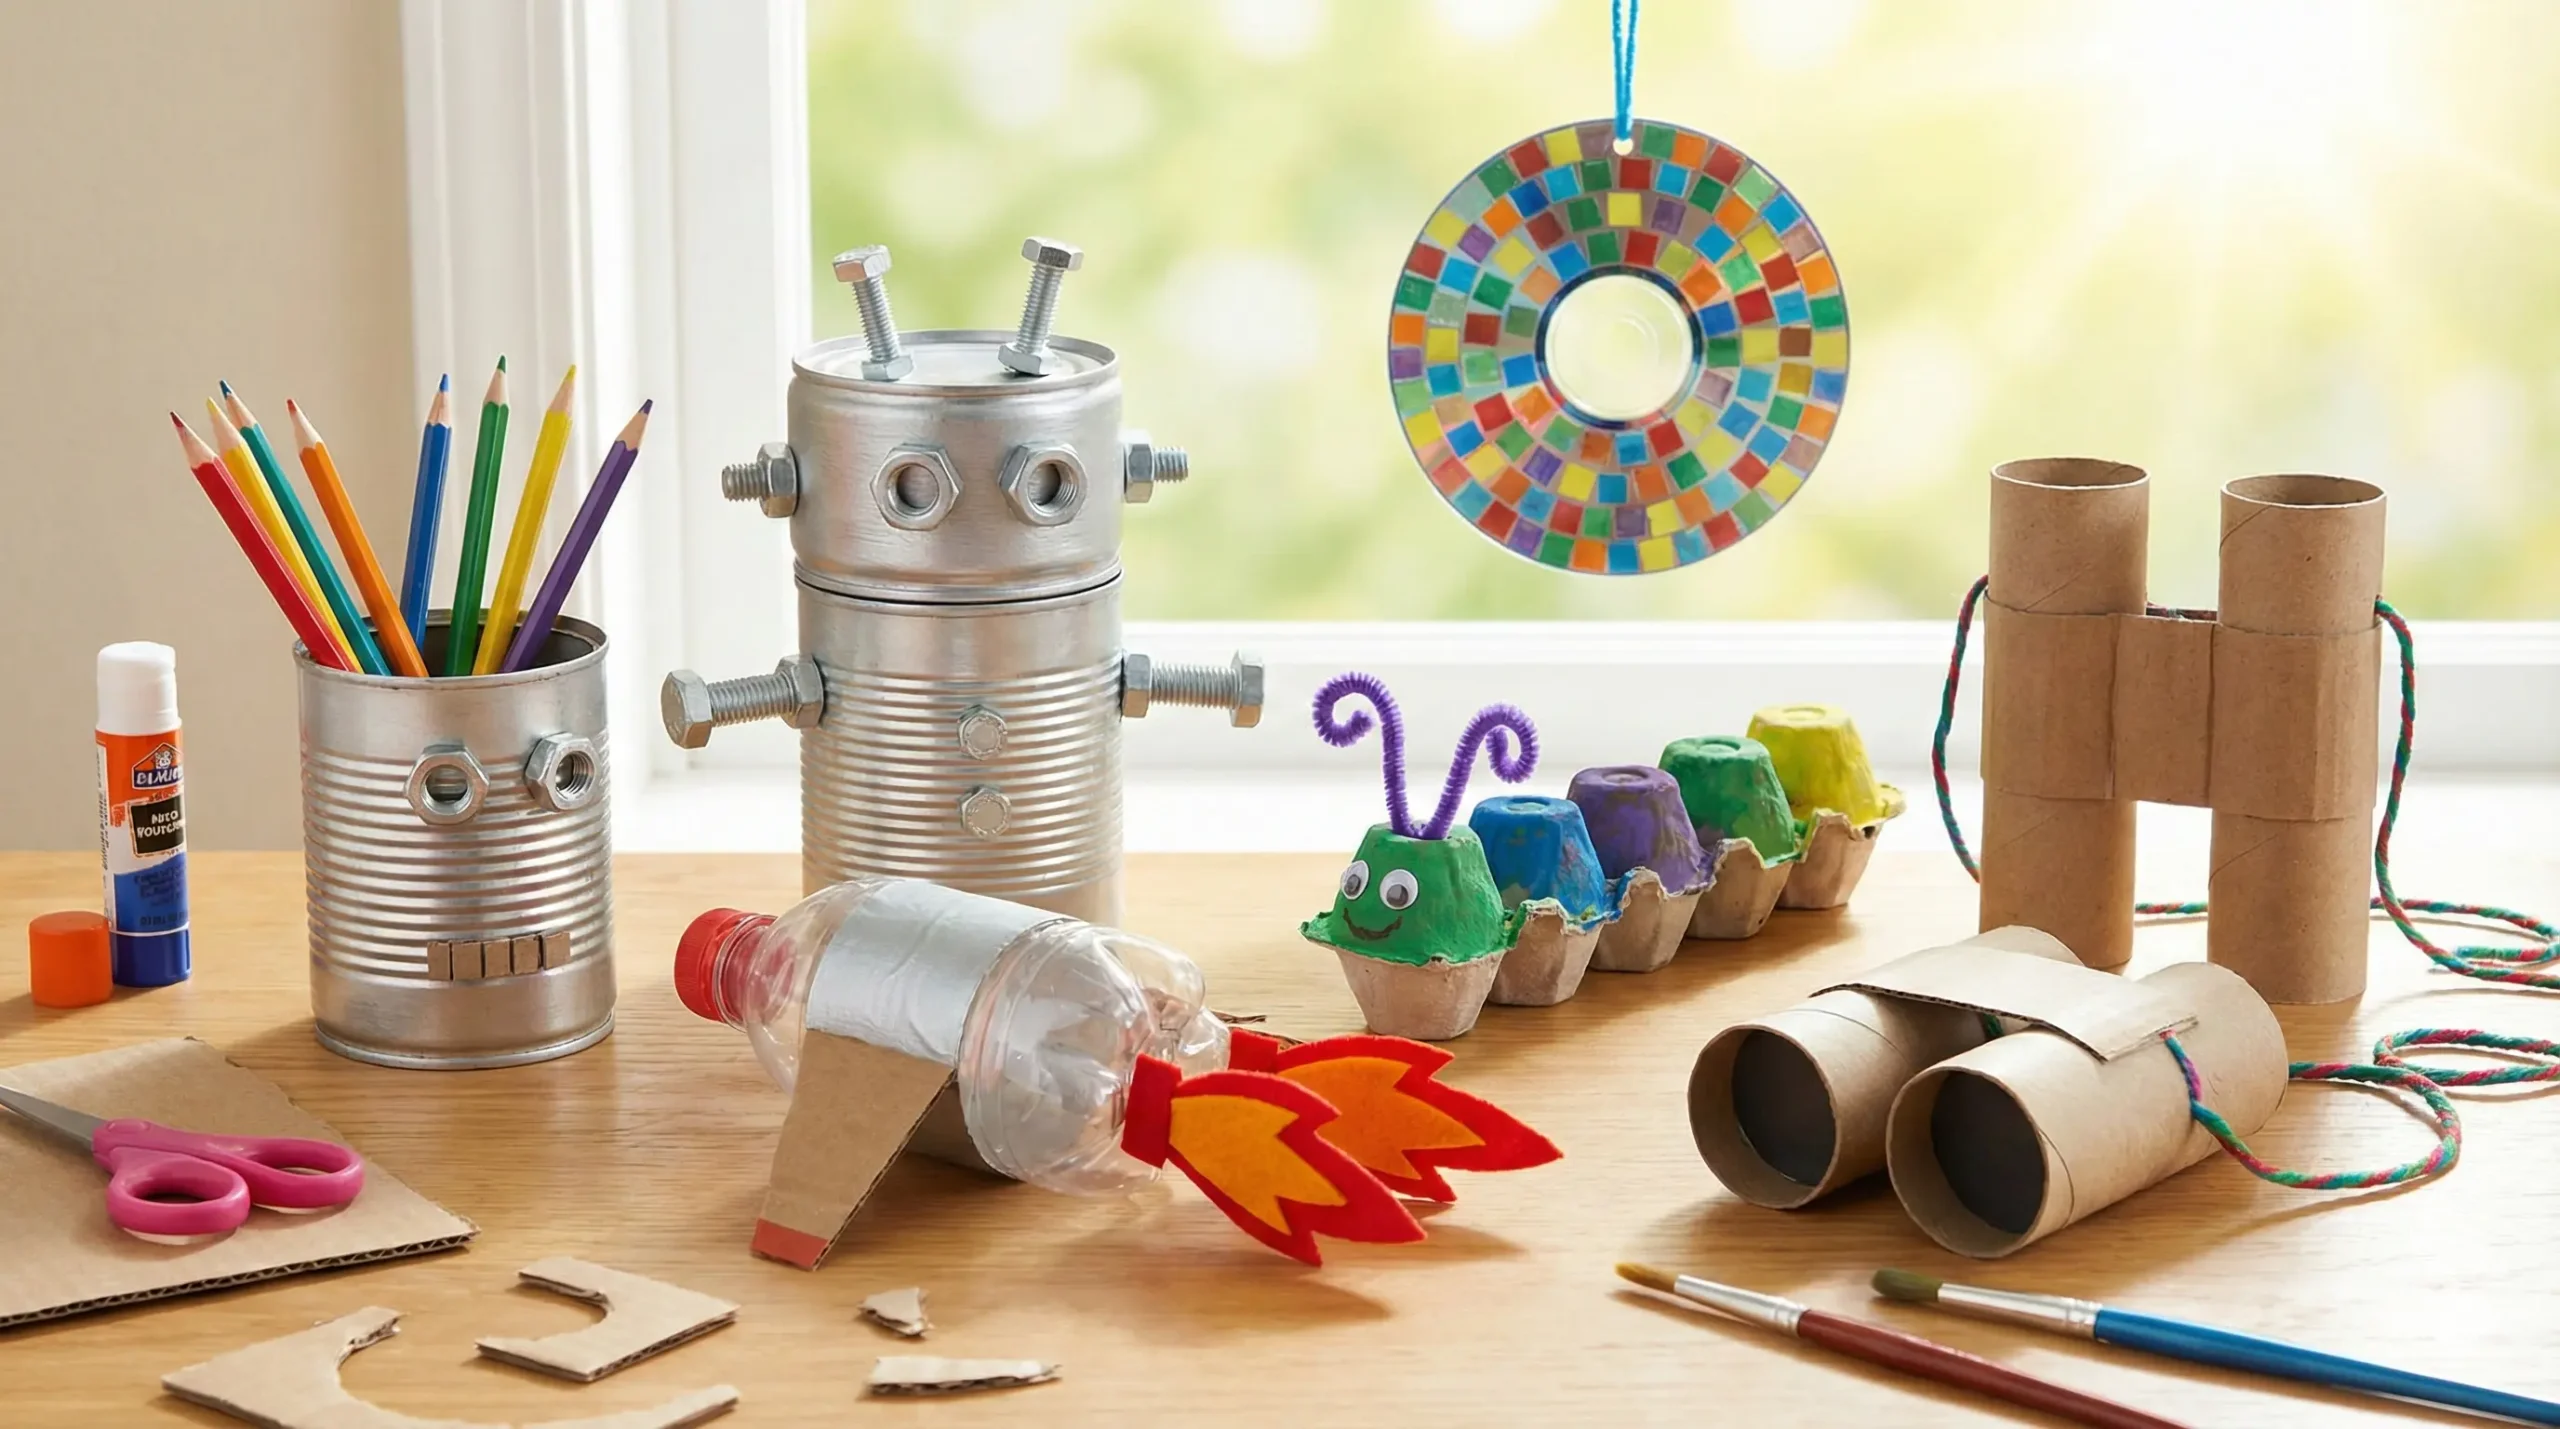
1. The “Robot” Tin Can Pencil Holder
Tin cans are a staple in most pantries. Instead of tossing them in the recycling bin, turn them into a desk organizer with personality.
- Materials: Clean empty tin can (ensure no sharp edges), nuts, bolts, washers, strong glue, silver paint.
- The Process: Clean the can thoroughly and file down any sharp edges. Have the kids paint the can silver or grey. Once dry, use strong glue to attach washers for eyes, bolts for ears, and nuts for a nose.
- Why we love it: It teaches kids that “industrial” waste can be artistic. Plus, it keeps their desk tidy!
2. Plastic Bottle Jet Packs
This is a classic that fuels hours of imaginative play. It transforms a piece of trash into a vehicle for adventure.
- Materials: Two 2-liter soda bottles, silver spray paint, red and orange felt (or tissue paper), cardboard, webbing or ribbon straps.
- The Process: Spray paint the bottles silver. Cut flame shapes out of the red and orange felt and glue them inside the bottle necks (the “nozzles”). Glue the two bottles side-by-side onto a square of cardboard. Attach shoulder straps to the cardboard so your child can wear it like a backpack.
- Why we love it: It encourages active, screen-free play.
3. Egg Carton Caterpillars
For the younger crafters (toddlers and preschoolers), egg cartons offer the perfect shape for creepy crawlies.
- Materials: Cardboard egg carton, paint, pipe cleaners, googly eyes.
- The Process: Cut a strip of cups from the egg carton (usually 4-6 cups long). Turn it upside down and let the kids paint each “hump” a different color. Poke two holes in the front cup and thread a pipe cleaner through for antennae. Glue on eyes and draw a smile.
- Why we love it: It’s a great way to use up those paper cartons that pile up, and it works on color recognition.
4. Cereal Box Shadow Theater
Don’t flatten that cereal box just yet! It’s the perfect stage for storytelling.
- Materials: Empty cereal box, parchment paper or tracing paper, tape, black cardstock, skewers/straws, flashlight.
- The Process: Cut a large rectangle out of the front and back of the cereal box, leaving a frame. Tape parchment paper over one of the openings (this is the screen). Cut puppet shapes (monsters, animals) out of black cardstock and tape them to skewers. Place a flashlight behind the box in a dark room and perform a show!
- Why we love it: It promotes narrative skills and confidence in public speaking (or puppet speaking!).
5. No-Sew T-Shirt Tote Bag
We all have t-shirts with a stain or a small hole. Instead of throwing them away, turn them into a reusable grocery bag.
- Materials: Old t-shirt, scissors.
- The Process: Cut the sleeves off (these become the handles). Cut the neckline out to make the opening larger. Cut fringe strips (about 3 inches long) all along the bottom hem of the shirt. Tie the front fringe strips to the corresponding back fringe strips tightly twice. Turn the shirt inside out (or leave it fringe-out for a boho look).
- Why we love it: It replaces plastic bags and requires zero sewing skills.
6. Firefly Mason Jar Lanterns
Glass jars are durable and perfect for outdoor decor.
- Materials: Clean glass jar (pasta sauce or pickle jar), glow sticks or battery-operated fairy lights, glitter (biodegradable if possible).
- The Process: Wash the jar and remove the label. You can have the kids paint the outside with translucent paint or simply place a cracked glow stick or fairy lights inside. Adding a little glitter inside shakes up the light and makes it look like fairies or fireflies are trapped inside.
- Why we love it: It makes a magical nightlight for camping or backyard sleepovers.
7. Cardboard Tube Safari Binoculars
A quintessential craft for explorers.
- Materials: Two toilet paper rolls, glue/tape, yarn, stickers/paint.
- The Process: Paint the tubes or cover them in camouflage paper. Glue them side-by-side. Punch a hole on the outside of each roll and attach a long piece of yarn so it can hang around the neck.
- Why we love it: It acts as a prop that encourages children to go outside and observe nature.
8. Mosaic CD Suncatchers
Old CDs and DVDs are becoming obsolete. Their shiny surface is perfect for reflecting light.
- Materials: Old CDs, permanent markers, gems/sequins, clear glue, ribbon.
- The Process: Let the kids color patterns on the shiny side of the CD using permanent markers. Glue on sequins for extra sparkle. Tie a ribbon through the center hole and hang it in a sunny window.
- Why we love it: It teaches light reflection and repurposes electronic waste which is hard to recycle.
9. Milk Carton Bird Feeder
Help the local wildlife using a sturdy beverage carton.
- Materials: Empty milk or juice carton, paint, scissors, wooden spoon (or dowel), birdseed.
- The Process: Cut a “window” in the side of the carton, about 2 inches from the bottom. Punch a hole below the window and slide the wooden spoon through to the other side (this is the perch). Paint the outside. Fill the bottom with birdseed and hang from a tree.
- Why we love it: It connects upcycling with biology and caring for animals.
10. Bottle Cap Snake
If you collect plastic bottle caps, this is a fun toy that moves and rattles.
- Materials: 15-20 plastic bottle caps, a screwdriver (for adult use), string or strong cord, two larger caps for the head.
- The Process: An adult should punch a hole in the center of each cap. Thread the cord through the caps, stacking them sideways so they nestle against each other. Tie a knot at the tail. Draw a face on the head cap.
- Why we love it: The movement of the snake is very tactile and satisfying for kids.
11. Magazine Paper Beads
Turn junk mail and old magazines into wearable art.
- Materials: Glossy magazine pages, scissors, glue, toothpicks, elastic string.
- The Process: Cut long, thin triangles out of the paper. Apply glue to the back of the triangle. Starting at the wide end, roll the paper tightly around a toothpick. The tip of the triangle will glue down at the center, creating a bead shape. Slide off the toothpick, let dry, and string into a necklace.
- Why we love it: It requires fine motor precision and creates surprisingly beautiful jewelry.
12. Bubble Wrap “Stomp” Painting
This focuses on the process of upcycling packaging material for art.
- Materials: Bubble wrap, washable paint, large roll of paper (or old newspapers), tape.
- The Process: Wrap the child’s feet loosely in bubble wrap and secure with tape (like bubble boots). Lay out a long sheet of paper. Squirt paint on the paper. Let the kids walk, jump, and stomp on the paper.
- Why we love it: It combines sensory play with upcycling.
13. Yogurt Cup Wind Chimes
Small plastic cups are perfect for making gentle noise.
- Materials: Clean yogurt cups, string, beads, bells (optional), a stick.
- The Process: Poke a hole in the bottom of the yogurt cups. Thread string through them, securing them with large knots or beads so they hang at different lengths. Decorate the cups with stickers. Tie all the strings to a stick and hang it outside.
- Why we love it: It adds a visual and auditory element to the garden.
14. Cardboard Box City
If you have a lot of delivery boxes, go big!
- Materials: Various sizes of boxes, markers, tape, scissors.
- The Process: Don’t break the boxes down. Instead, stack them to create skyscrapers, houses, and shops. Cut out doors and windows. Draw bricks and roof tiles. Create an entire metropolis in the living room.
- Why we love it: It encourages cooperative play if siblings or friends are involved.
15. Toy Animal Jar Toppers
We all have those tiny plastic zoo animals that hurt when you step on them. Give them a permanent home.
- Materials: Glass jars with lids, small plastic animal toys, strong glue, spray paint (one color).
- The Process: Glue the feet of the animal toy to the center of the jar lid. Once dry, spray paint the entire lid and the animal the same color (e.g., gold, matte black, or teal). Screw it back on the jar.
- Why we love it: It looks chic and expensive, perfect for storing crayons, marbles, or hair ties.
Tips for Successful Upcycling with Kids
- Safety First: Upcycling often involves materials that might have sharp edges (like tin cans) or require cutting tough plastic. Always supervise closely. Adults should handle the preparation (cleaning, punching holes, cutting thick cardboard) while kids handle the assembly and decoration.
- Cleanliness is Key: Before starting, ensure all food containers (yogurt cups, milk cartons, jars) are thoroughly washed and dried to prevent smells or mold.
- Let Them Lead: The spirit of upcycling is imagination. If your child thinks the robot needs three heads instead of one, let them do it! The goal is to see potential in the material.
Conclusion
Upcycling is more than just a craft activity; it is a mindset. By showing our children that a cardboard tube can be a telescope, or a tin can can be a robot, we are teaching them resilience, resourcefulness, and respect for our planet.
So, the next time you head to the recycling bin, pause for a moment. Take a look at that “trash” and ask your kids, “What could this become?” You might be surprised by the magical ideas they come up with.