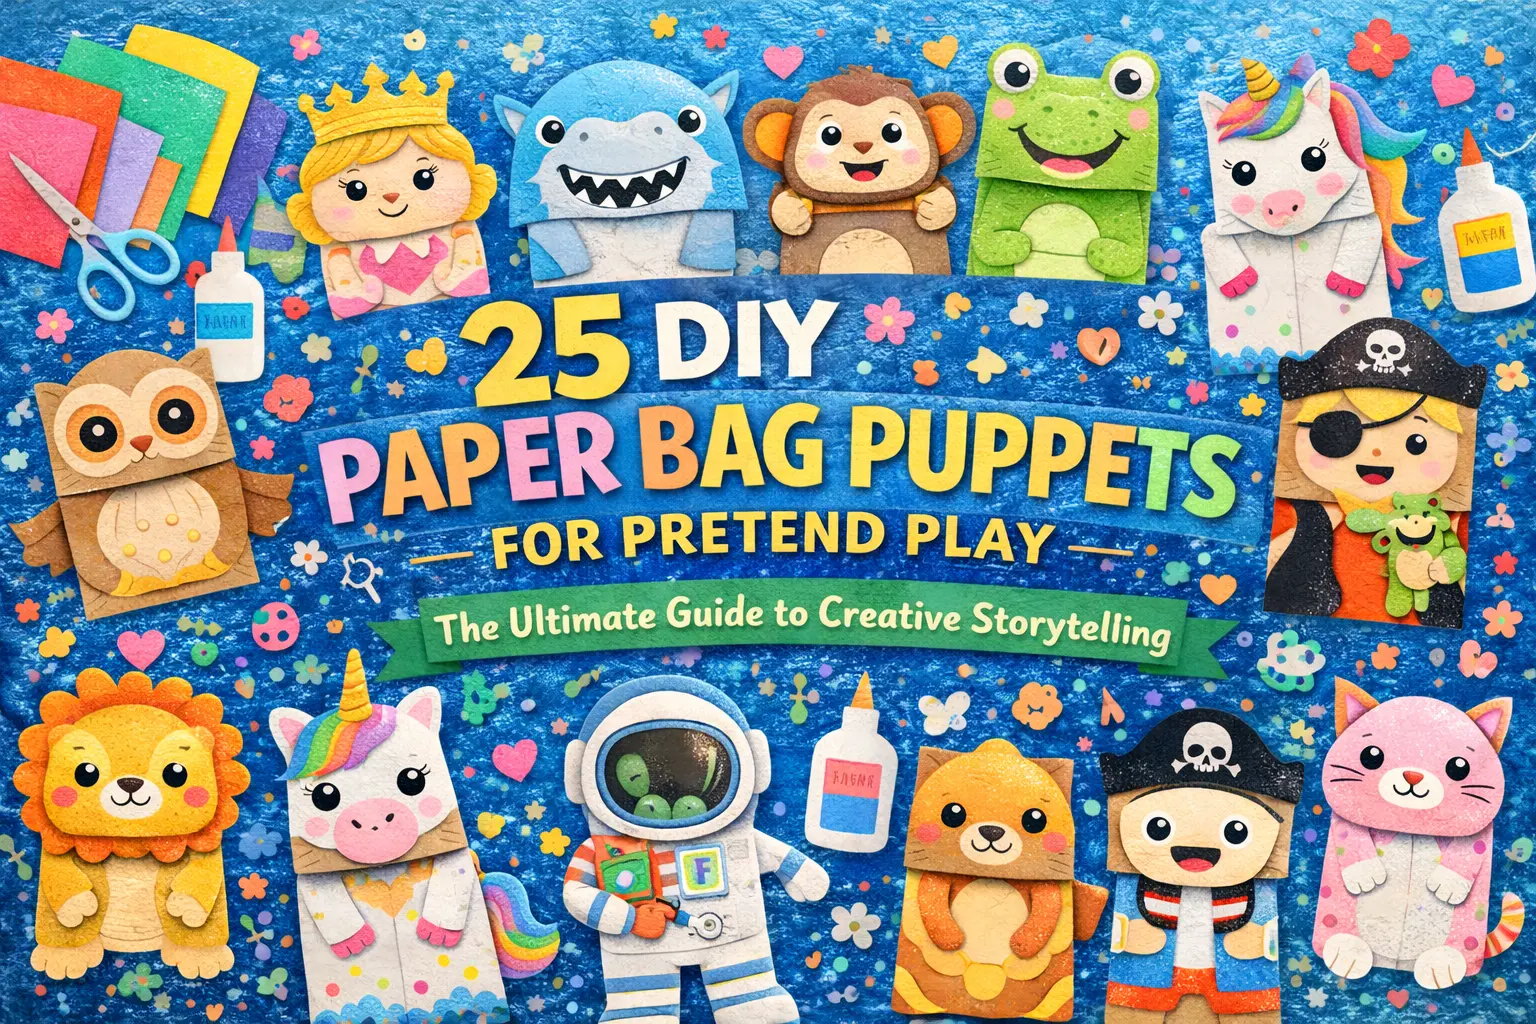
It is always magical when you can think of a fun way to use an everyday item—it is like looking at the world with brand-new eyes! Take a plain brown paper lunch bag, for instance. To most adults, it is just a vessel for sandwiches or groceries. But to a child with an imagination, that flapping rectangular bottom is a mouth waiting to speak.
With just a little glue and creativity, that humble bag can be transformed into a princess, a roaring lion, a space alien, or anything else by making DIY Paper Bag Puppets!
Today, we have rounded up our best ideas for paper bag puppets that are perfect for kids to use in pretend play. Whether you are a teacher planning a unit on wildlife, a parent looking for a rainy day activity, or a librarian organizing storytime, this list has you covered.
Why Paper Bag Puppets Are the Perfect Craft
Before we dive into the list of 25 ideas, let’s talk about why this specific craft has stood the test of time.
- Affordability: You can buy a pack of 100 brown or white paper lunch bags for just a few dollars.
- Motor Skills: Manipulating the bag to make the puppet “talk” helps develop hand muscles and coordination in young children.
- Communication: Puppets are incredible tools for shy children. They allow kids to express feelings and practice dialogue through a character, which often feels safer than speaking directly.
- Recycling: It is a fantastic way to upcycle clean grocery bags or lunch sacks.
Essential Materials for Your Puppet Workshop
To get started, set up a “Puppet Station” with these basics. You don’t need expensive supplies; scraps work best!
- Paper Bags: Standard size (roughly 5×10 inches).
- Cardstock/Construction Paper: For eyes, ears, and accessories.
- Adhesives: Glue sticks for paper, liquid glue for heavier items.
- Scissors: Safety scissors for kids, sharp ones for adults.
- Embellishments: Googly eyes, yarn (for hair), pipe cleaners (for whiskers), buttons, and markers.
The Ultimate List: 25 DIY Paper Bag Puppets
We have categorized these into themes to help you plan your puppet show!
Theme 1: Woodland & Forest Animals
Perfect for teaching kids about nature and habitats.
1. The Busy Beaver This is a classic Canadian symbol! Use dark brown paper for the body. The key feature here is the tail—cut a large oval from cardstock and draw a “cross-hatch” pattern on it to look like scales. Don’t forget two big white rectangular teeth sticking out from the flap!
2. The Curious Badger Badgers are fascinating creatures with distinct black and white facial markings. Cut a white stripe to go down the center of the bag’s face and add black patches over the eyes. This is a great craft to pair with the book The Wind in the Willows.
3. The Red Panda The Red Panda soared in popularity after the 2022 movie Turning Red. Use reddish-orange paper or paint for the body. Use white paper to create the distinct markings on the ears and cheeks. Add a striped tail to the back of the bag for extra cuteness.
4. The Wise Old Owl Use a white or brown bag. Cut out dozens of colorful paper circles to glue onto the body as “feathers.” The most important part is the eyes—make them huge and wide using yellow and black paper.
5. The Sly Fox Use orange paint or paper. Cut out triangular ears and a triangular snout. A fluffy white chest made of cotton balls or shredded paper adds a nice texture.
6. The Grumpy Bear A brown bear is a staple for stories like Goldilocks. Use rounded ears and a lighter brown snout. You can make him happy or grumpy depending on how you draw the mouth on the flap.
Theme 2: Prehistoric & Mythical Creatures
Spark the imagination with creatures that don’t exist (or no longer exist).
7. The Roaring T-Rex Dinosaur Studies show that kids obsessed with dinosaurs often have high intelligence! Create a green T-Rex. The secret to a good dino puppet is the mouth—when the child lifts the flap, glue a red tongue and scary white zig-zag teeth inside so they appear when the dino “roars.”
8. Fire-Breathing Dragon Paint the bag green or purple. Add triangles along the side for spines. Glue strips of red, orange, and yellow tissue paper inside the flap. When the puppet opens its mouth, “fire” shoots out!
9. Magical Unicorn White bags work best here. Use yarn in rainbow colors for the mane and tail. Twist a piece of gold pipe cleaner or use glitter paper for the horn. Add big eyelashes for a glamorous look.
10. Three-Eyed Alien There are no rules in space! Paint the bag neon green or silver. Add three (or four, or five!) googly eyes. Use pipe cleaners as antennas sticking out of the top.
11. The Friendly Monster Great for Halloween or just for fun. Use bright fur (faux fur fabric) or fuzzy felt to cover the bag. Give the monster mismatched eyes and silly teeth.
Theme 3: Farm & Pets
Relatable animals that toddlers love to mimic.
12. The Spotted Cow Start with a white bag and let the kids cut out irregular black shapes to glue all over. Add a pink oval for the snout and horns at the top.
13. The Pink Pig Paint the bag pink. Use a button or a bottle cap for the nose (snout). Curl a pink pipe cleaner for the tail and glue it to the back.
14. Floppy-Eared Dog Brown, black, or spotted—any dog works! Cut long, tear-drop shapes for ears and glue them only at the top so they flop around when the puppet moves.
15. Whiskered Cat Cut triangle ears. Use black pipe cleaners or stiff fishing line for the whiskers. You can make a “Grumpy Cat” or a “Cheshire Cat” depending on the smile.
Theme 4: People & Professions
Great for “When I Grow Up” career days.
16. The Brave Firefighter Create a yellow or red helmet from cardstock to glue on the top. Draw a uniform on the bottom half of the bag with buttons and a badge.
17. The Doctor/Nurse Draw a white coat on the body. Use yarn for hair. You can cut out a small stethoscope from paper and glue it around the neck.
18. The Superhero Let the kids design their own hero symbol for the chest. The most essential part is the cape—glue a rectangle of fabric or paper to the back of the bag so it flies when they run.
19. The Royal Princess/Prince Use yarn for long hair and foil for a shiny crown. You can use scraps of fabric or lace to make a “gown” for the body of the bag.
20. The Pirate Draw an eye patch on the face. Use a red bandana made of paper or fabric for the head. A drawn-on beard or mustache completes the look.
Theme 5: Seasonal & Holiday Puppets
Keep these ideas handy for holidays.
21. Santa Claus A red body with a black belt. Use copious amounts of cotton balls for the beard and the trim of the hat.
22. The Easter Bunny Use a white bag. Cut very long, tall ears. Use pink pom-poms for the nose and a cotton ball for the tail on the back.
23. Halloween Pumpkin (Jack-O-Lantern) Paint the bag orange. Draw a Jack-O-Lantern face on the top flap. Add a green stem. This is a unique twist on the usual pumpkin craft.
24. The Turkey Perfect for Thanksgiving. Glue colorful paper feathers (red, orange, yellow) fanning out from the back of the bag. Add a “wattle” (the red bit) to the beak.
25. The Snowman White bag. Draw three black “coal” buttons on the body. Glue real twigs to the sides for arms. Add an orange paper nose.
Pro-Tips for Making Your Puppets “Pop”
Now that you have your list, here are three expert techniques to take these puppets from “good” to “amazing.”
1. The Mouth Mechanism
The magic of a paper bag puppet is the flap.
- The Trick: Always decorate under the flap. If you are making a frog, color the underside of the flap red. When the mouth is closed, you see green lips. When it opens, you see a red mouth. This “peek-a-boo” effect delights children.
2. Texture is Key
Don’t just stick to paper.
- Use cotton balls for sheep wool or Santa beards.
- Use tin foil for robot bodies or knight armor.
- Use yarn or ribbon for hair and tails.
- Use cupcake liners for dresses or lion manes.
3. Make them Stand
Paper bag puppets are usually worn on the hand, but if you want to display them:
- Stuff the bag with newspaper to puff it out.
- Insert a toilet paper roll inside to give it structure so it can stand on a shelf.
3 Fun Script Ideas for Pretend Play
Once the glue is dry, the show must go on! Here are three quick scenarios to get the kids started:
- The Mixed-Up Zoo: The Lion (Puppet #5 variant) wants to trade voices with the Cow (Puppet #12). The kids have to act out the Lion saying “Moo” and the Cow saying “Roar” until they figure out how to switch back.
- The Lost Alien: The Alien (Puppet #10) lands in the forest and meets the Owl (Puppet #4). The Owl has to teach the Alien how to behave on Earth (e.g., “We don’t eat rocks, we eat sandwiches!”).
- The Superhero Rescue: The Superhero (Puppet #18) has to save the Cat (Puppet #15) who is stuck in a “tree” (the sofa).
Conclusion
The humble paper bag is one of the most versatile tools in a crafter’s arsenal. With these 25 DIY Paper Bag Puppet ideas, you are not just making a craft; you are building a gateway to storytelling, emotional expression, and hours of screen-free fun.