With Easter coming up in about a month, the air is getting warmer, the flowers are starting to bloom, and the anticipation for the Easter Bunny is building! It is the perfect time to dig into some Easter decorations and crafts perfect for kids of all ages.
Whether you are a teacher looking for classroom activities, a parent wanting to reduce screen time over spring break, or just looking for some last-minute Easter decor, this list has you covered. Crafting with children is about more than just the end product; it is about fine motor skills, color recognition, and making memories that last longer than the chocolate eggs.
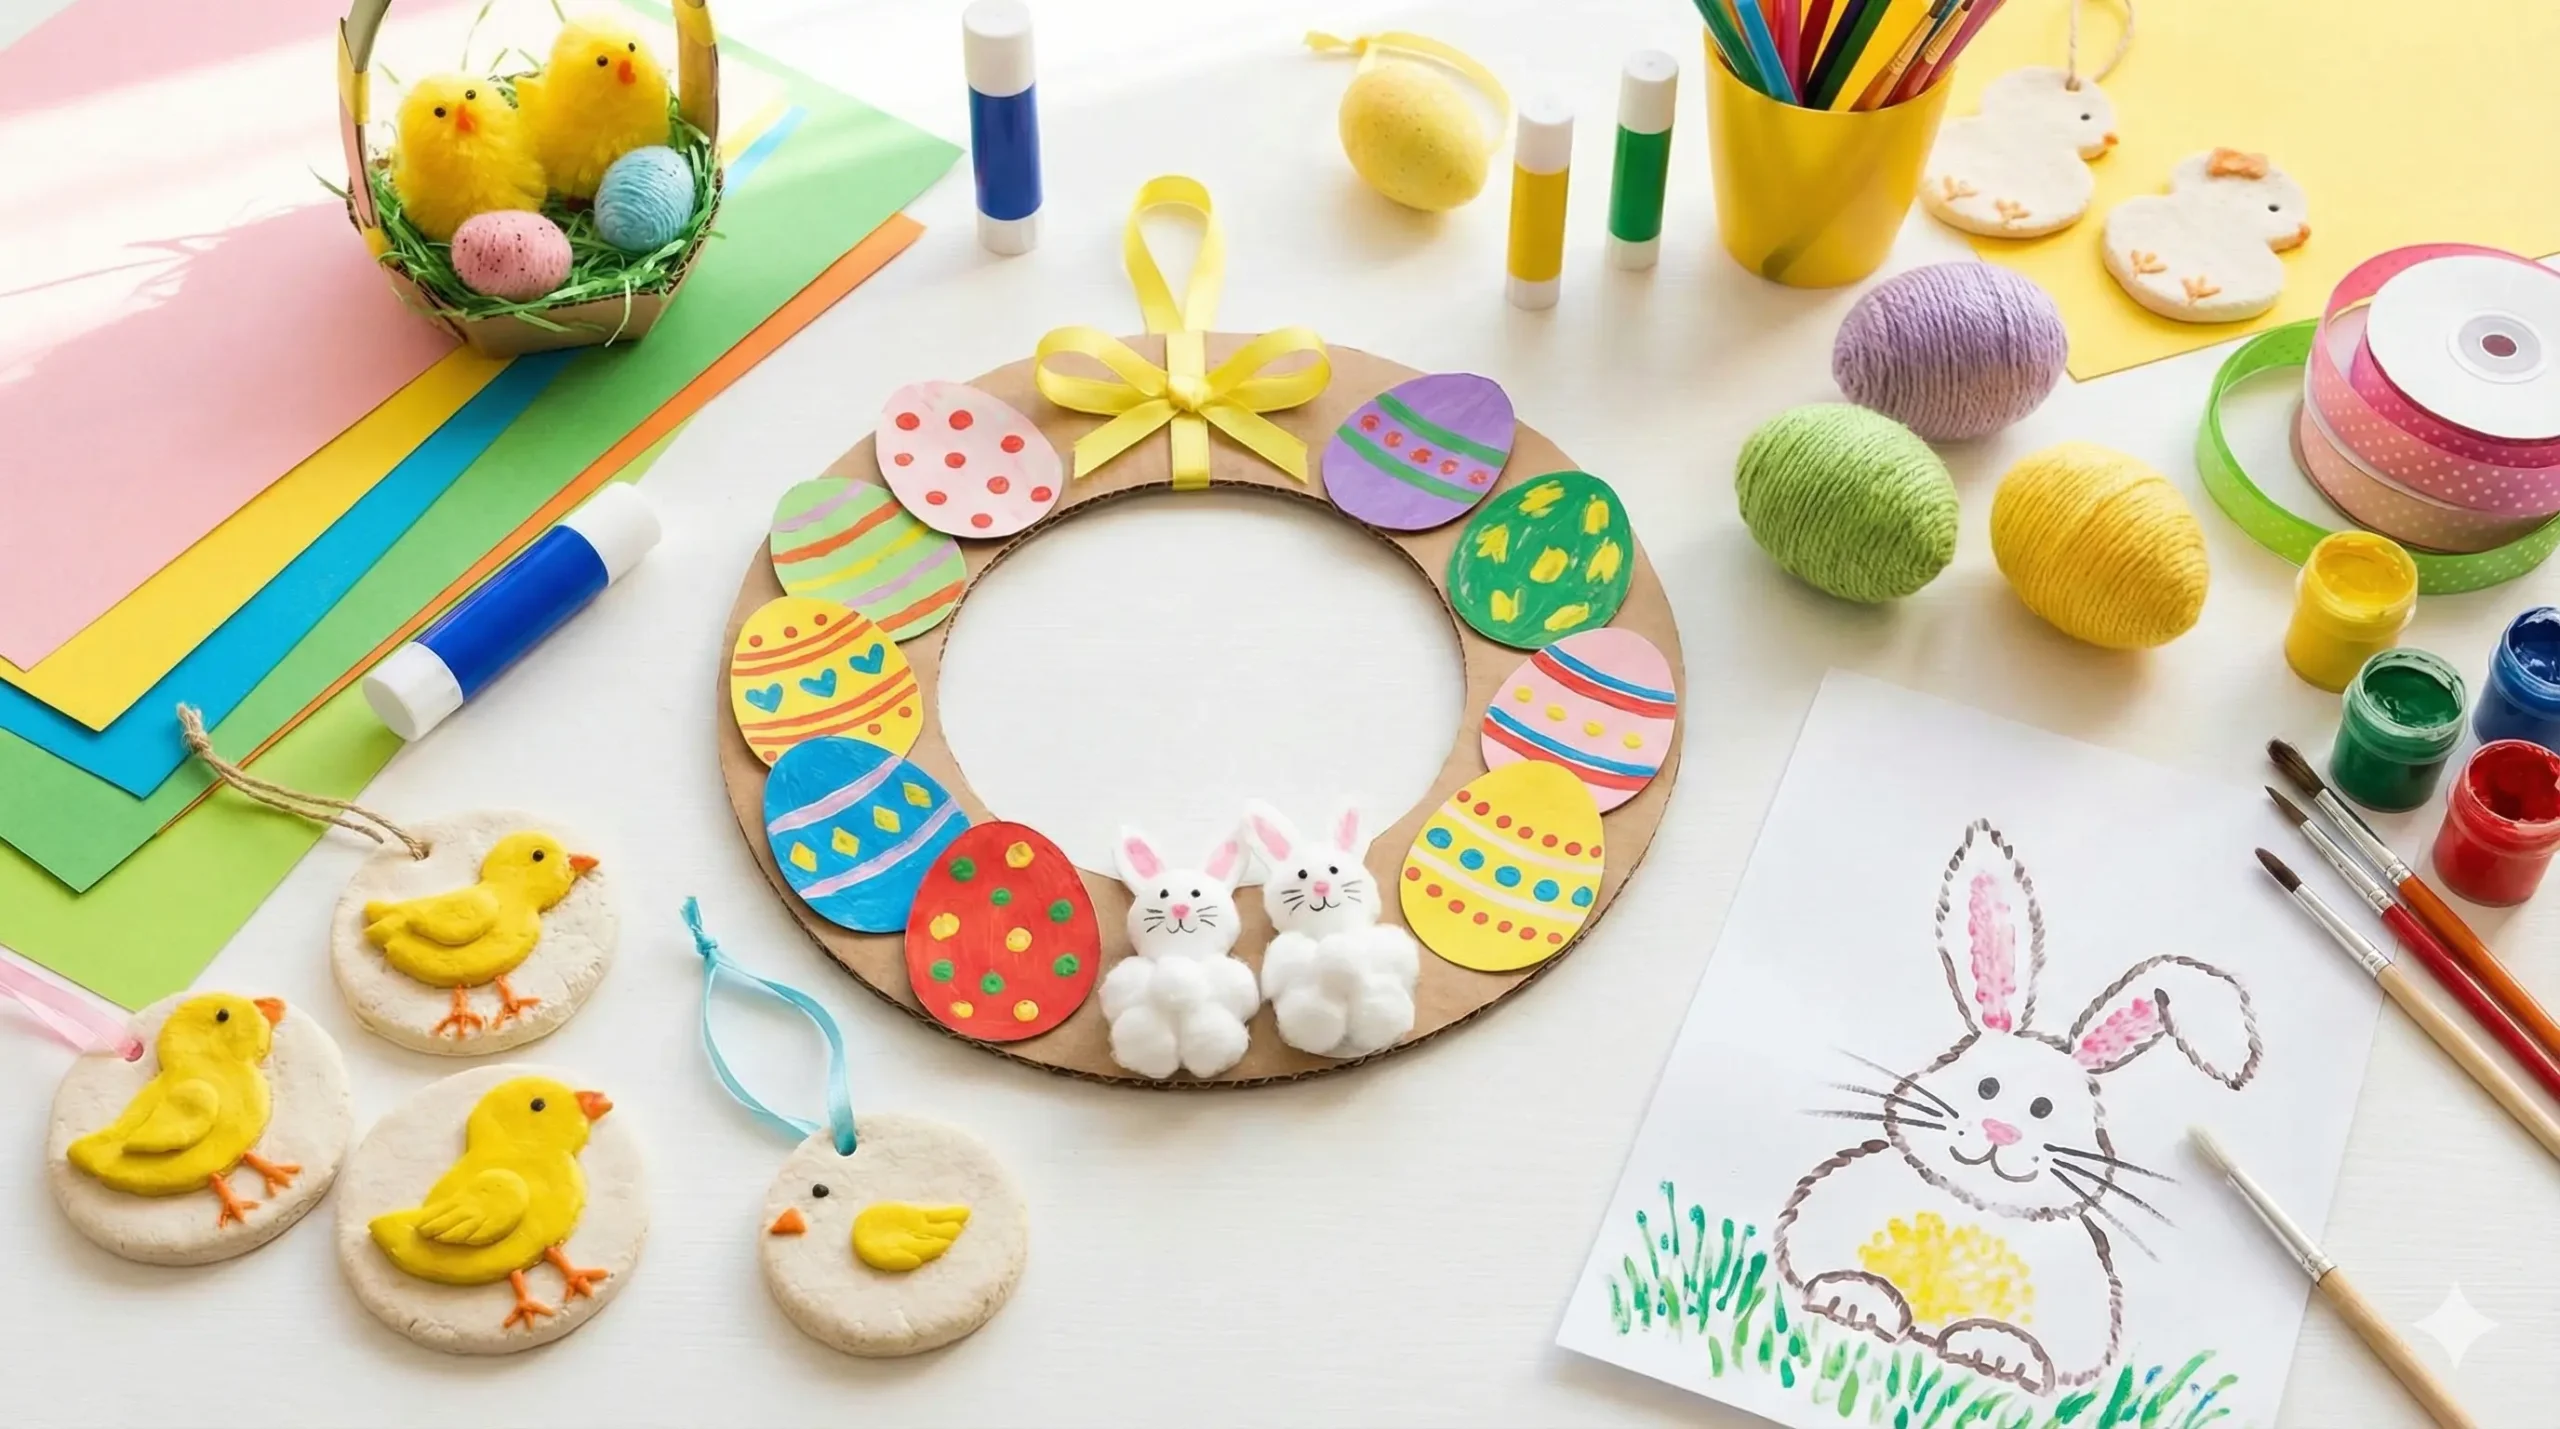
I have compiled 25 of the Cutest Easter Crafts for Kids, categorizing them into Bunnies, Chicks, Egg Decorating, and Home Decor. Let’s hop right into it!
Part 1: Bouncing Bunny Crafts
The Easter Bunny is the star of the show! These crafts celebrate our favorite long-eared friend.
1. Q-Tip Pointillism Bunny Art
Spring is just around the corner, and this is a fantastic way to introduce children to “pointillism” art. By dipping Q-tips into white paint and stamping them onto a bunny silhouette drawn on colored paper, kids create a fluffy, textured look. It is mess-free and helps toddlers work on their grip.
2. Pop-Up Paper Plate Bunny
This craft is interactive and super fun. using a paper plate folded in half as the base, you can attach ears and a face. The “pop-up” mechanism usually involves a stick or a simple fold that allows the bunny to play peek-a-boo. Kids will love playing with their creations long after the glue dries.
3. Cardboard Tube Bunnies
Never throw away your toilet paper rolls! Paint the tubes pastel colors, add googly eyes, and cut long ears out of construction paper. These stand up on their own, making them perfect for a cute tablescape at Easter brunch.
4. The Easy Paper Bunny Mask
This craft is fun for kids of all ages and doubles as a costume. Cut a bunny face shape out of stiff cardstock. You can use these to decorate your house, or attach a wooden spoon or popsicle stick to the back with strong sticky tape to turn them into handheld puppets or masks for a school play.
5. Sock Bunnies
Do you have a mismatched sock whose partner was lost in the laundry? Fill the sock with rice, tie it off with rubber bands to create a head and body, and cut the top cuff into ear shapes. No sewing is required—just some ribbon and a marker for the face!
6. Handprint Bunny Keepsakes
Trace your child’s hand on white paper, but cut off the thumb (or fold it back). The fingers act as the ears and the palm is the face. These make adorable cards to send to grandparents.
7. Cotton Ball Bunny Tail Art
Print out a picture of a bunny from the back. Have your toddler dip cotton balls in glue and stick them on the bunny’s bottom to make a fluffy tail. It is a sensory-friendly craft that is impossible to mess up.
Part 2: Egg-cellent Decorating Ideas
Move beyond the standard dye kit with these creative twists on the Easter Egg.
8. Sequined Styrofoam Eggs
For a sparkle-filled afternoon, pick up some styrofoam eggs and a pack of multi-colored sequins. Using small pins (for older kids) or glue (for younger ones), cover the egg in sequins. These “dragon scale” eggs look dazzling in an Easter basket.
9. Salt Dough Egg Ornaments
If you want a keepsake that lasts for years, salt dough is the answer. Mix flour, salt, and water to create a dough, roll it out, and cut egg shapes with a cookie cutter. Once baked and dried, kids can paint them with bright patterns. Hang them on an indoor “Easter Tree” branch.
10. Ruffled Fabric Eggs
Are you terrified of messy food dyes staining your carpet? This one is for you. Use plastic eggs or styrofoam bases and cover them with strips of ruffled fabric or scrap ribbon. It is a great way to use up sewing scraps and results in a chic, farmhouse-style decoration.
11. Galaxy Space Eggs
Use bold hues to decorate your Easter eggs with out-of-this-world color combinations. Sponge paint black, dark blue, and purple acrylics onto the egg, then splatter with white paint for stars. It’s a cool, modern twist for older kids who think traditional pastels are “boring.”
12. Yarn Wrapped Eggs
This can be done two ways. You can wrap yarn around a plastic egg for texture, or dip yarn in glue and wrap it around a small water balloon. Once the glue dries, pop the balloon, and you are left with a hollow, architectural yarn egg. These make beautiful garland fillers.
13. Quilled Easter Egg Craft
Quilling involves rolling thin strips of paper into coils and shaping them. Fill an egg outline on paper with colorful paper coils. This craft combines all the elements of an Easter celebration—rabbits, eggs, and the greenery of spring—into a sophisticated piece of art that looks great framed.
14. Sticker Resist Eggs
Place stickers (circles, stars, or lines) on a plain egg. Dip the egg in dye. Once dry, peel the stickers off. The area under the sticker remains white, creating a crisp, professional-looking pattern.
Part 3: Cheerful Chicks and Birds
It wouldn’t be spring without hearing a little “cheep cheep!”
15. The Beginner Sewing Chick
This darling craft is perfect for school or home and is fabulous for teaching children the beginnings of how to sew. Cut a chick shape out of cardstock and punch holes around the perimeter. Give the child a plastic needle and yellow yarn to “sew” around the edges.
16. Handprint Chicken Artwork
This is really simple to make and results in a cute keepsake. Paint your child’s hand yellow (for a chick) or white (for a hen) and stamp it on paper. Add an orange beak and stick legs with a marker. It captures the size of their hand perfectly for that year.
17. Paper Plate Nests with Blue Birds
Cut a paper plate in half to create a nest pocket. Fill it with brown shredded paper. Then, make baby birds out of blue pom-poms and pop them inside. It is a cozy little scene that looks great on the fridge.
18. Fork Print Chicks
Similar to the Q-tip art, this uses a plastic fork. Dip the back of the fork in yellow paint and stamp it in a circle pattern. The tines of the fork create a “feathery” texture that looks just like a fuzzy baby chick.
Part 4: Wreaths and Home Decoration
Let the kids help decorate the front door and the dining table.
19. The “I Can Do It” Cardboard Wreath
Who would have thought that even 2-year-olds can chime in to make an Easter Wreath? Cut a large donut shape out of cardboard. Let the kids decorate paper eggs (using crayons, glitter, or stickers) and glue them all around the ring. It is an egg-cellent welcome sign for your door.
20. Rustic Moss and Egg Wreath
If you are looking for a unique Easter egg wreath, this is the one. Using plastic speckled eggs of various sizes, some craft wire, moss, and a glue gun (adult supervision required), you can assemble a wreath that looks like it came from a high-end boutique.
21. Yarn Egg Garland
Remember the yarn eggs we mentioned earlier? String them together to create a lightweight, colorful garland to drape over the fireplace mantel or across a window.
22. Button Wall Art
Here is how to make a simple piece of art that looks adorable. Lightly sketch an egg or bunny outline on a canvas. Have the kids fill in the shape by gluing down colorful buttons of different sizes. It creates a mosaic effect that is tactile and visually stunning.
23. Bunny Ear Napkin Rings
Cut toilet paper rolls into smaller rings. Wrap them in fabric or paint them. Glue on two small felt ears. Slide your Easter brunch napkins through these rings for a table setting that the kids can proudly say they contributed to.
24. Mason Jar “Candy” Vases
Paint clean mason jars in pastel colors (chalk paint works best). Once dry, you can distress them with sandpaper for a rustic look. Fill them with daffodils or tulips. Alternatively, fill clear jars with jellybeans and stick artificial flowers in the center for a sweet centerpiece.
25. The Paper Chain Countdown
Just like a Christmas countdown chain, make one for Easter! Use pastel papers (pink, mint, lavender, yellow). Each day, remove a link in the chain to count down the days until Easter Sunday.
Tips for Stress-Free Crafting with Kids
To ensure these projects remain fun and don’t turn into a chaotic mess, keep these tips in mind:
- Prep Ahead: Cut out the shapes and pour the paint before calling the kids over. Attention spans are short!
- Embrace Imperfection: If the bunny ears are crooked or the egg is brown because they mixed all the paints, praise the effort. It is their masterpiece.
- Dress for the Mess: Old t-shirts or aprons are essential, especially when working with acrylic paints or dyes.
- Adhesives Matter: For paper, glue sticks are best. For buttons or heavy items, use tacky glue. Hot glue should always be handled by an adult.
Conclusion
Easter is such a hopeful, joyful time of year. It represents new beginnings, blooming nature, and the warmth of family gatherings. By setting aside an afternoon to work on these 25 cute Easter crafts, you are building traditions that your children will look back on fondly.