Have you ever watched a toddler playing with play-dough? There is a look of pure focus and delight on their faces as they squish the colorful substance, rolling it into snakes, balls, and wobbly snowmen. It is a sensory experience that defines childhood. But here is the secret: you don’t have to outgrow that joy!
Clay crafting is one of the most versatile, affordable, and rewarding hobbies for children of all ages. Whether you are using air-dry clay that hardens overnight or polymer clay that bakes to a permanent finish, the possibilities are endless.
With National Clay Week celebrated annually in the second week of June (typically around the 8th to the 14th), there is no better time to get your hands messy. This week celebrates the cultural significance of clay, but for us, it’s about celebrating imagination.
If you are looking for a way to pull the kids away from screens and get them working with their hands, you have come to the right place. We have curated a list of 30 cute and easy clay crafts for kids—ranging from functional decor to pop-culture favorites—that are a breeze to make.
Let’s gather our tools and dive in!
The Basics: Choosing Your Clay
Before we jump into the projects, it is important to choose the right medium. This adds educational value to your project!
- Air-Dry Clay: This is perfect for younger children. It feels like earth clay but dries hard when left out for 24-48 hours. It can be painted with acrylics or markers after drying.
- Polymer Clay: This comes in vibrant colors and doesn’t dry out. It requires an adult to bake it in a standard oven to cure it. It’s great for making durable jewelry and figurines.
- Homemade Clay: You can even make your own using flour, salt, and water!
Category 1: Adorable Animal Friends
Animals are the most popular subject for clay modeling because they rely on simple shapes: circles for heads and ovals for bodies.
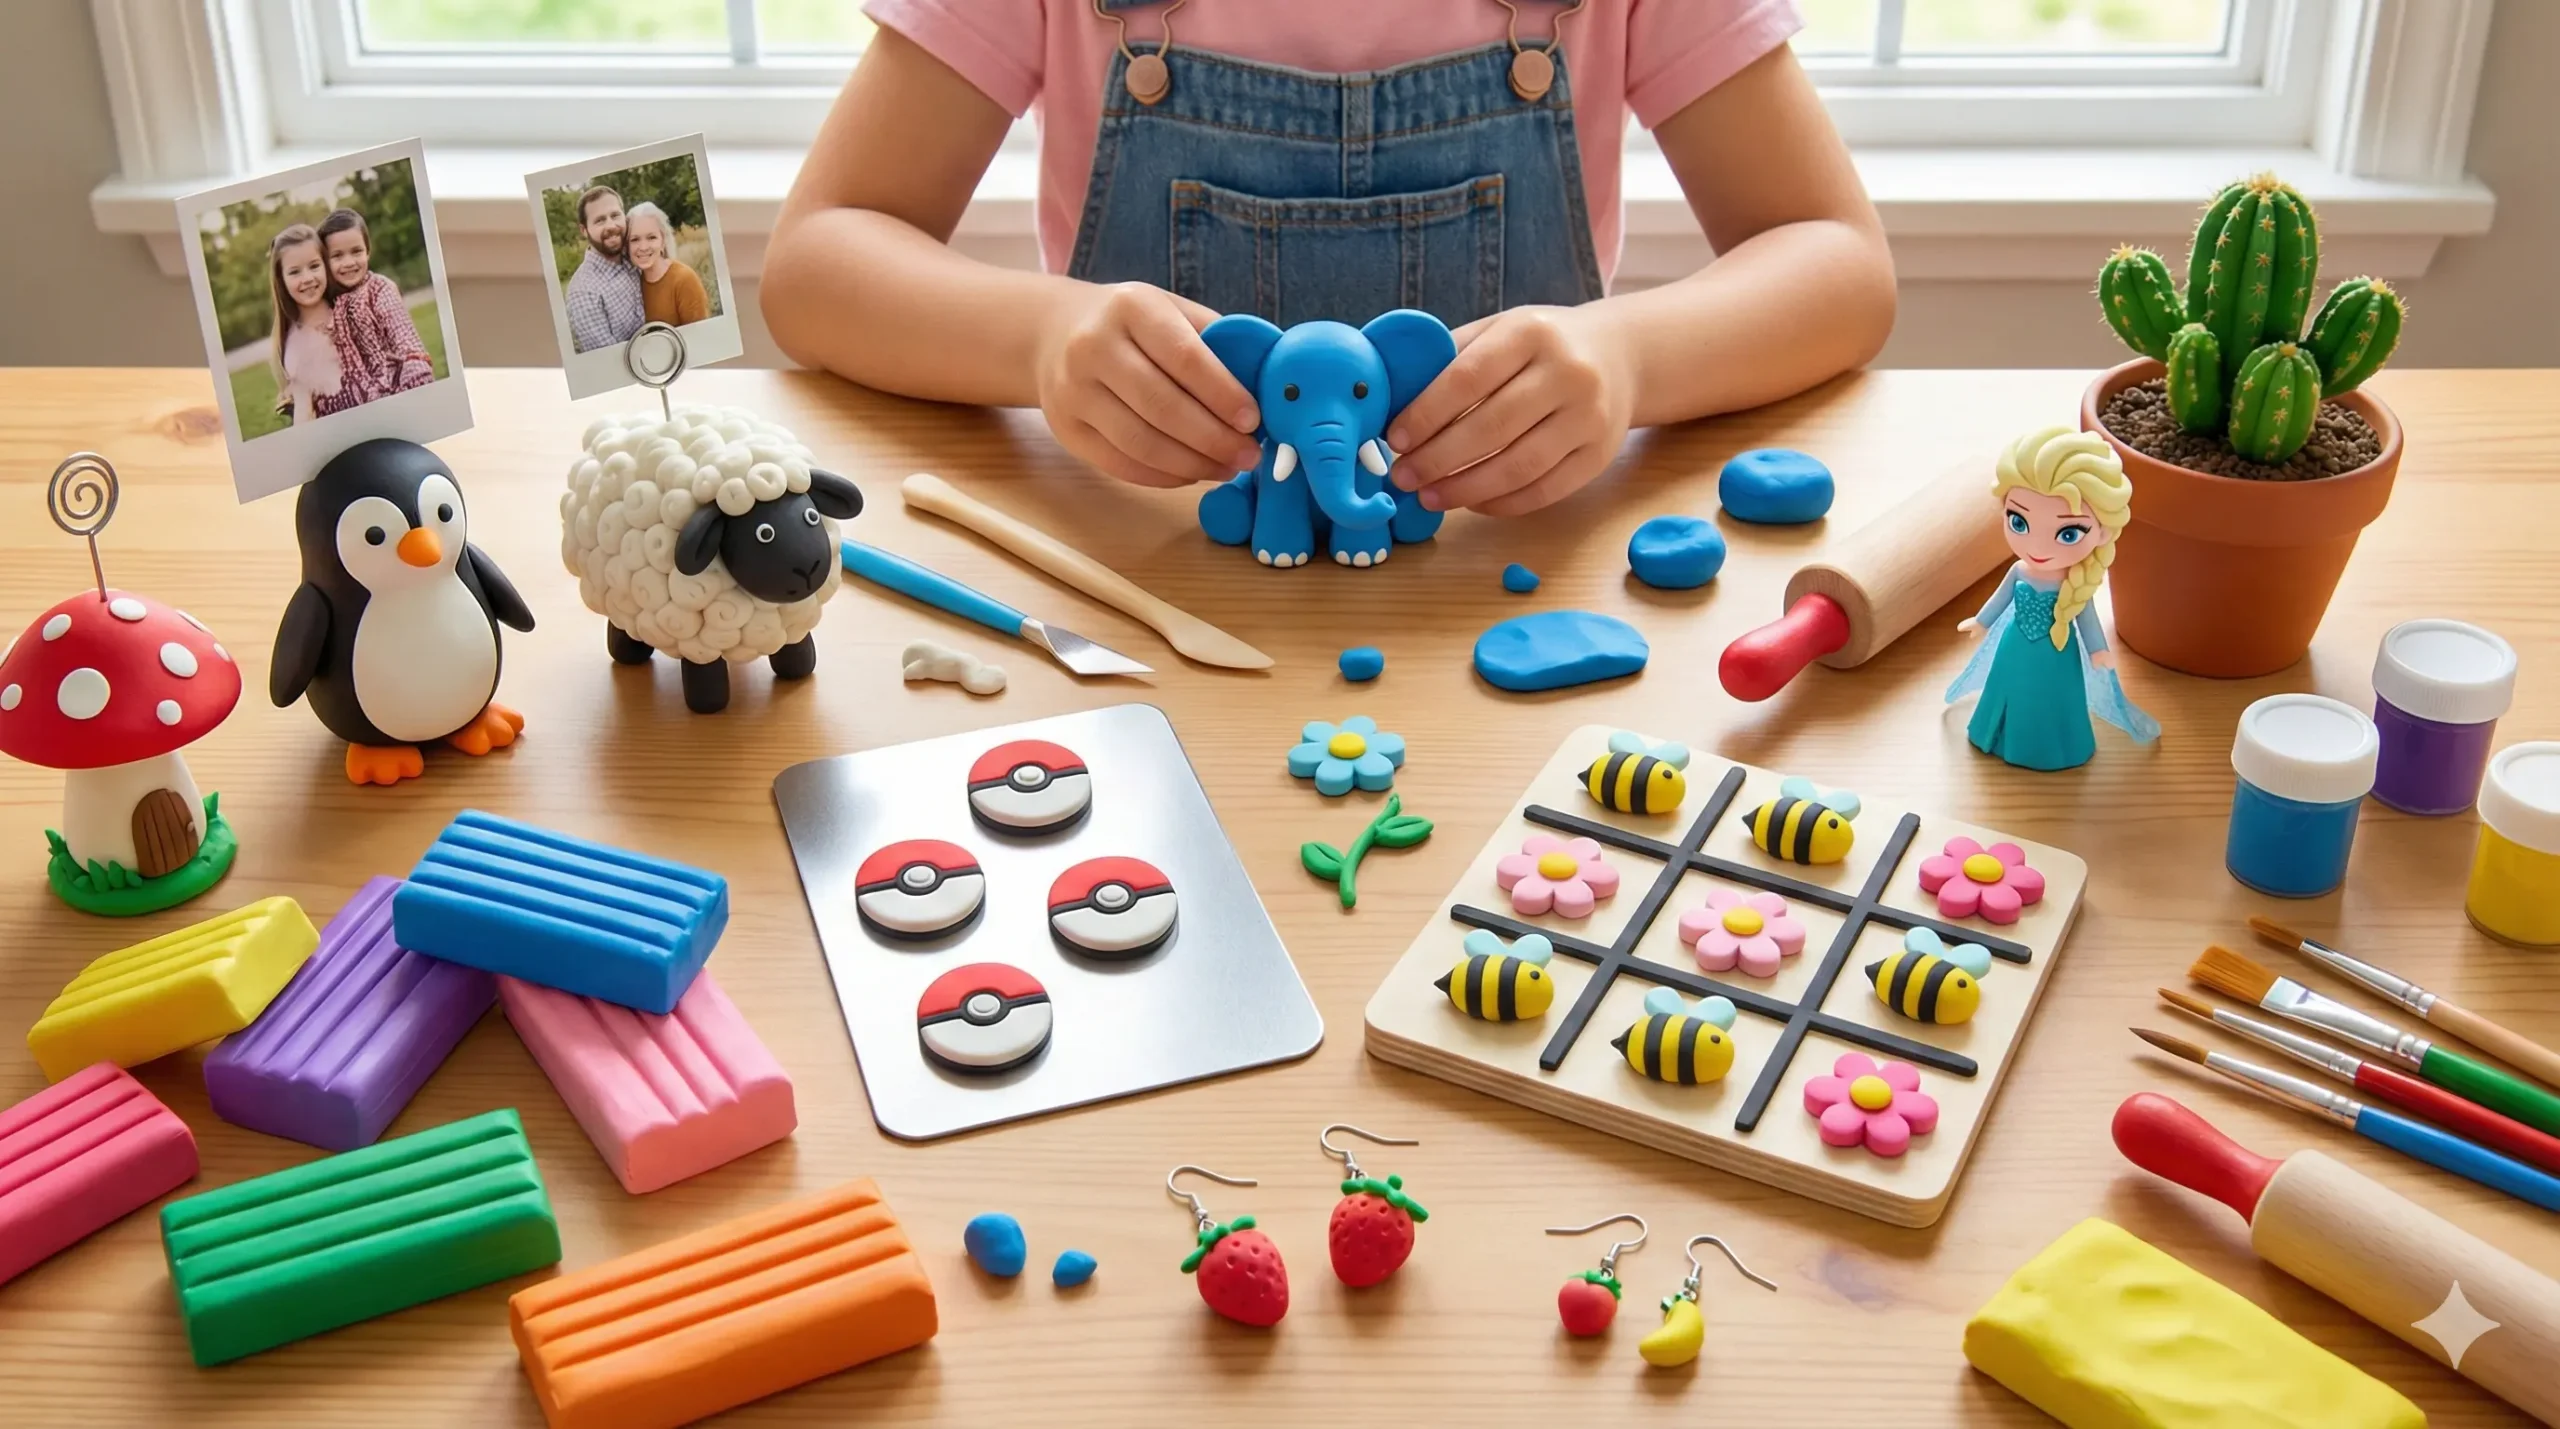
1. Penguin Memo Holders
These cute little waddlers are perfect for holding notes on a desk.
- How to make it: Roll a black ball for the body and a smaller white flat circle for the tummy. Add an orange beak and feet.
- The Function: Before the clay dries, insert a twisted piece of wire or a paperclip into the top of the head. Once dry, this clip can hold a photo or a “Don’t Forget!” note.
2. Wooly Sheep Photo Holder
This is a fantastic project for Spring or Easter.
- The Technique: Create a grey oval for the face. The fun part is the “wool.” Have your child roll dozens of tiny white balls of clay and press them all over the body to create a bumpy, wooly texture. It helps develop patience and fine motor skills.
3. Coil Snails
- The Idea: Roll a long “snake” of clay. Roll it up into a spiral shell. Place this shell on top of a thicker, shorter snake (the body). Add two tiny antennae.
4. Spiky Hedgehogs
- The Tool Tip: Shape a teardrop for the body. Use a pair of safety scissors to make small snips in the clay on the back. When the clay lifts slightly, it looks like quills!
5. Tiny Turtles
- The Idea: A green flattened sphere for the shell and little legs poking out. You can use a toothpick to draw a pattern on the shell.
- More Animal Ideas:
- Spotted Ladybugs (Red clay with black dots)
- Lazy Sloths (Great for hanging on pencil cups)
- Wise Owls (Use a marker cap to stamp feather textures)
Category 2: Fun and Games
Why just make a statue when you can make a game? Clay is durable enough to create playable pieces.
9. Spring Theme Tic-Tac-Toe
Ditch the paper and pencil for something more permanent.
- The Board: Create a flat square slab of clay and use a ruler to score a grid into it.
- The Pieces: Instead of X’s and O’s, sculpt 5 tiny bees (yellow and black stripes) and 5 tiny flowers.
- Why we love it: It makes for a wonderful travel game or a handmade gift for a sibling.
10. DIY Custom Dice
- The Idea: Shape a perfect cube. Use the end of a paintbrush to indent the numbers (dots) 1 through 6 on the sides. Bake or dry, then paint.
11. Clay Marbles
- The Idea: If you have leftover scraps of polymer clay, twist them together to create a marbled effect and roll them into perfect spheres.
12. “Among Us” Crewmates
- The Idea: These popular video game characters are incredibly easy to make. They are essentially an oval with a backpack and a visor. Kids love making a whole army of them in different colors.
Category 3: Pop Culture & Fantasy
Let your children bring their favorite characters to life.
13. Pokéball Magnets
Got any Pokémon fans? This is a must-make.
- The Design: Flatten a ball into a disk. The top half is red, the bottom half is white, and a black strip goes across the middle with a white button in the center.
- The Utility: Glue a small magnet to the back once it’s dry. They look fantastic holding up artwork on the fridge.
14. Princess Elsa Doll
Frozen fans, rejoice!
- The Challenge: This requires a bit more skill. Focus on the iconic blue dress and the long blonde braid. If making the face is too hard, you can make a “Chibi” version—which means a big head and small body without a nose or mouth—it looks very cute and modern!
15. Minecraft Blocks
- The Idea: Since Minecraft is all about blocks, clay is the perfect medium. Create “Dirt” blocks, “TNT” blocks, or “Creeper” heads using square cutters.
16. Dragon Eggs
- The Idea: Shape an egg. Press teardrop-shaped pieces of clay (scales) all over it starting from the bottom and overlapping as you go up.
Category 4: Nature & Decor
Decorate your room with items that bring the outdoors inside.
17. Mushroom Photo Holders
Mushrooms always make a space look like a fairytale forest.
- The Build: Use a thick white cylinder for the stem and a red cap with white polka dots. Like the penguin, insert a wire for holding photos.
- Tip: These are top-heavy, so make sure the base of the stem is wide and flat so it doesn’t tip over.
18. No-Kill Cactus Pots
Do you love plants but forget to water them?
- The Craft: Fill a tiny terracotta pot with brown clay (soil). Sculpt a green cactus shape, add textures for needles, and “plant” it. It never needs water and looks adorable on a windowsill.
19. Leaf Impressions
- The Technique: Go for a nature walk and collect distinct leaves. Roll out a slab of air-dry clay. Press the leaf into the clay, then gently peel it back. It leaves a perfect fossil-like print that you can paint green or gold.
20. Rainbow Keychains
- The Idea: Roll four thin snakes of clay in different colors. Arch them into a rainbow shape and press them together. Poke a hole at the top before drying to add a keychain ring later.
- More Decor Ideas:
- Donut Paperweights (With sprinkles!)
- Miniature Food (Burgers, pizza slices)
- Flower Pinch Pots
Category 5: Jewelry and Wearables
Wear your art! Polymer clay is especially good for this as it is lightweight and durable.
24. Friendship Necklaces
- The Idea: Make a heart shape, then cut it in a zig-zag down the middle. One friend keeps the left side, the other keeps the right.
25. Cookie Cutter Pendants
- The Technique: Roll the clay flat and use mini cookie cutters (stars, hearts, moons) to punch out shapes. Poke a hole for a string. These are the easiest crafts for toddlers.
26. Braided Bracelets
- The Idea: Roll three very thin snakes of clay. Braid them together gently. Join the ends to form a bangle (ensure it’s big enough to slide over the hand) or bake it as a flat strip and glue ribbon to the ends.
27. Fruit Earrings
- The Idea: Tiny orange slices, watermelons, or strawberries. Glue them onto earring posts for a fresh summer look.
Category 6: Functional & Giftable Items
Finally, let’s make things we can actually use.
28. The Classic Pinch Pot
- The Method: Roll a ball. Stick your thumb in the center. Pinch the walls while rotating the ball to create a bowl. These are great for holding paperclips, rings, or coins.
29. Ring Dishes
- The Shape: Trace your hand on a slab of clay. Cut it out. Curl the fingers up slightly. Once dry, the fingers can hold rings.
30. Pencil Toppers
- The Idea: Mold a small figure (like a monster or a bird) directly onto the end of a pencil.
- Note: If using polymer clay, check if the pencil can go in the oven (wood usually can, plastic cannot). Alternatively, form the hole, remove the pencil, bake, and glue it on later.
Tips for Success with Clay
To ensure your crafting session is a success, keep these tips in mind:
- Keep it Clean: Dust and pet hair love sticking to clay. Wipe your surfaces and wash hands before starting, especially when working with white clay.
- Fighting Cracks: If using air-dry clay, use a little water on your finger to smooth out cracks before leaving it to dry.
- Sealing: To make your creations last, seal them with a coat of Mod Podge or clear acrylic spray sealant. This gives them a professional shine and protects paint from chipping.
- Glues: If a head falls off a body after drying, don’t panic! A dot of super glue or tacky glue fixes almost any clay mishap.
Conclusion
From the magical world of Pokémon to the simple joy of a Tic-Tac-Toe board, clay offers a medium where the only limit is your imagination. These 30 cute and easy clay crafts for kids are designed to build confidence, improve fine motor skills, and result in a keepsake that you can cherish for years.