One fun thing about festivals and holidays is that each one has its own unique tradition that has been carried down through the ages. For instance, Christmas has a decorated tree, Easter has an egg hunt, and New Year’s has fireworks.
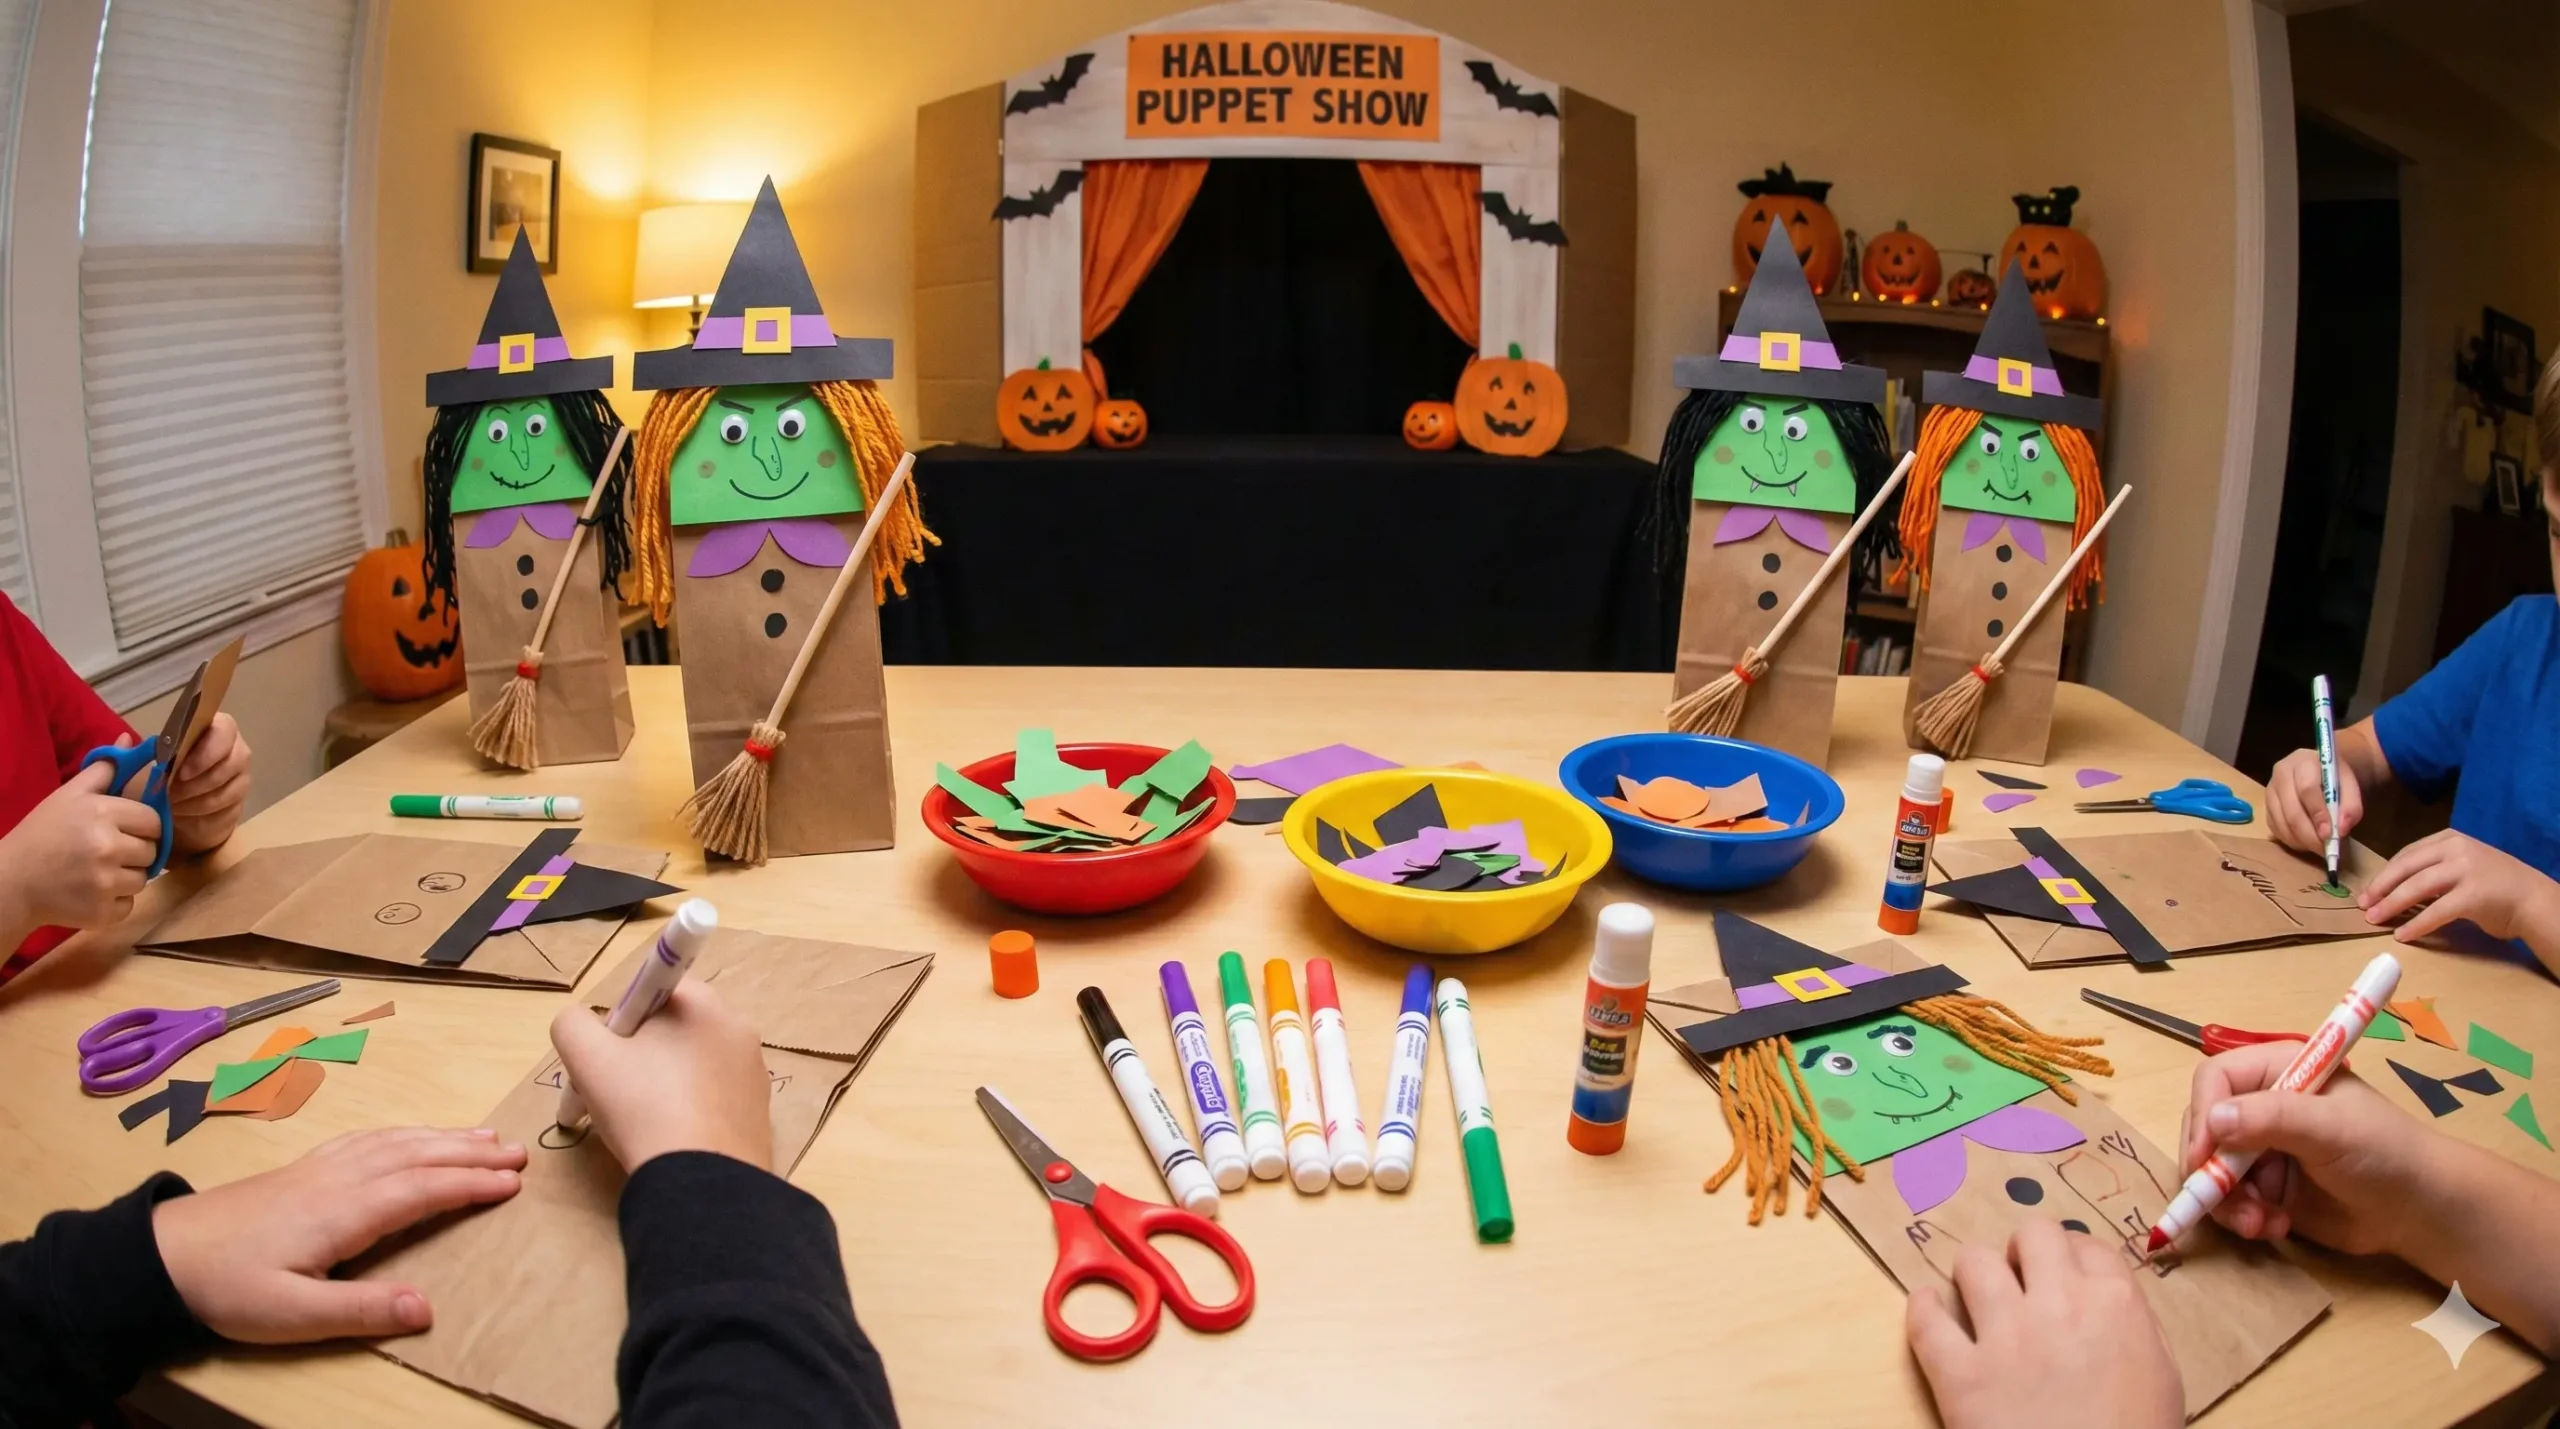
But what about Halloween? Sure, we have trick-or-treating, pumpkin carving, and plenty of spooky specials on TV. However, this year, why not try something a little different to spark creativity in your home or classroom? Why not host a Halloween Puppet Show?
If you are wondering how on earth you can put together a Halloween puppet show, the answer starts with the puppets themselves! And when it comes to Halloween, you absolutely cannot have a show without the star of the season. You will love making this Fun and Easy Paper Bag Witch Puppet Craft.
It is simple, budget-friendly, and allows for endless customization. Whether you are a teacher looking for a classroom activity or a parent wanting a rainy-day project, this witch puppet is the perfect solution.
Why Choose Paper Bag Puppets?
Before we dive into the supplies and instructions, let’s talk about why paper bag puppets are a staple in childhood crafting.
- Accessibility: Brown paper lunch bags are incredibly cheap and readily available at almost any grocery store.
- Motor Skills: This craft requires cutting, tracing, and gluing, which are essential for developing fine motor skills and hand-eye coordination in preschoolers and young children.
- Imaginative Play: Unlike a static drawing, a puppet is a toy. Once the crafting is done, the play begins. It encourages storytelling, voice acting, and social interaction.
- Low Mess: Unlike painting pumpkins or slime activities, this craft is relatively “dry” and easy to clean up.
Supplies Required
To get started, gather your materials. You likely have most of these in your craft drawer already.
- Brown Paper Lunch Bag: Standard size.
- Colored Craft Paper or Cardstock: You will need Black (hat/robe), Green (skin—or any color you prefer), Orange/Red (hair), and Brown (broom).
- Scissors: Safety scissors for kids, or sharp scissors for adults to help with detailed cuts.
- Glue: A glue stick works best for paper-to-paper connections to avoid wrinkling, but liquid school glue works too.
- Markers: Black Sharpies or colored markers for facial details.
- Optional: Glitter, yarn, stickers, or googly eyes for extra personality.
Step-by-Step Instructions: How to Make a Paper Bag Witch Puppet
Follow these detailed steps to bring your witch to life. We have broken this down to make it easy for kids to follow along.
Step 1: Prepare Your Workstation
Clear a flat surface. If you are working with very young children, it is helpful to pre-cut the larger shapes or have a template ready. If you don’t have a printable template, don’t worry! We will describe how to draw the simple shapes needed.
Step 2: Create the Witch’s Head and Face
The “flap” of the folded paper bag will serve as the puppet’s head.
- The Skin: Cut a square or rectangle of green craft paper (or purple/white) that fits the square flap of the paper bag. Glue this down securely.
- The Hair: Cut two strips of orange or red paper. You can make them jagged for “frizzy” witch hair or straight. Glue these to the sides of the head.
- The Face: Cut two white circles for eyes and stick them on (or use googly eyes for a silly look). Cut a small triangle for a nose.
- The Mouth: Lift the flap slightly. You can draw a mouth on the bag underneath the flap so that when the puppet “talks” (you move your hand), the mouth appears! Or, simply draw a smile on the green face piece.
Step 3: Dress the Witch (The Body)
The long part of the bag is the body.
- The Robe: Measure a piece of black or purple paper to cover the bottom three-quarters of the bag (under the flap). Glue it down.
- Decoration: Witches love style! Cut out tiny stars or moons from yellow paper and glue them onto the robe. You could also create a “belt” using a strip of ribbon or contrasting paper.
Step 4: The Iconic Witch Hat
It isn’t a witch without a pointy hat!
- The Brim: Cut a wide oval or rectangle from black paper. Glue this to the very top edge of the bag flap (above the eyes).
- The Cone: Cut a large triangle from black paper. Glue this on top of the brim.
- The Buckle: Cut a small square of yellow or gold paper and glue it to the center of the hat for that classic witchy look.
Step 5: Arms and Accessories
- Arms: Cut two long strips of the same color paper used for the robe. Glue these to the sides of the bag body.
- Hands: Cut small green mitten shapes and glue them to the ends of the arms.
- The Broomstick: Cut a thin strip of brown paper for the handle and a jagged trapezoid for the bristles. Glue them together. Attach the broom to one of the witch’s hands so she is ready to fly!
Tips for Customizing Your Witch
The best part of DIY crafts is making them unique. Here are some ideas to make your witch stand out:
- Texture: Instead of paper hair, use strands of yarn or crinkled tissue paper to give the witch a 3D effect.
- The Mole: Use a black marker to add a classic “witch’s mole” or wart to her nose or chin.
- The Cat: Make a small black cat out of paper and glue it to the witch’s shoulder or the bottom corner of the bag.
- Sparkle: Use glitter glue to outline the stars on her robe or the buckle on her hat.
- Friendly vs. Scary: You can decide the vibe! Give her a big smile and pink cheeks for a “Good Witch,” or slanted eyebrows and a jagged frown for a “Spooky Witch.”
How to Host a Halloween Puppet Show
Now that you have your puppet, don’t let the fun stop there! Using the puppet in a show helps children develop confidence and public speaking skills.
- The Stage: You don’t need a fancy theater. Drape a blanket over a table or turn a cardboard box on its side. Have the puppeteers hide behind the blanket, holding their paper bag witches up.
- The Story: Help your kids brainstorm a plot.
- Idea 1: The Witch who lost her cat and needs help finding him.
- Idea 2: The Witch who is trying to brew a potion but keeps adding the wrong ingredients (funny results!).
- Idea 3: A talent show where the Witch tries to sing or dance.
- The Audience: Gather the family, arrange some pillows on the floor, and turn down the lights. Use a flashlight as a spotlight for the puppets.
Educational Benefits of This Craft
As a parent or educator, it is great to know that this activity is more than just a time-filler.
- Cognitive Development: Following step-by-step instructions helps children learn sequencing and logic.
- Emotional Expression: Puppets allow children to express emotions they might be shy about. A shy child might be loud and confident when speaking as the “Witch.”
- Cultural Awareness: Discussing Halloween traditions helps children understand cultural festivities and community events.
Frequently Asked Questions (FAQs)
Q: What age group is this craft suitable for? A: This craft is perfect for children ages 3 to 8. Toddlers (3-4) will need help with cutting, while older children (5-8) can likely do the entire project independently.
Q: I don’t have brown paper bags. What can I use? A: You can use white paper bags (often found in the party section) or even an old envelope. If you don’t have bags at all, you can glue the pieces onto a popsicle stick to make a stick puppet instead!
Q: Can I use felt instead of paper? A: Absolutely! Felt makes for a more durable puppet. You will just need to use stronger glue (like tacky glue or a hot glue gun with adult supervision) to ensure the felt sticks to the paper bag.
Q: How do I make the puppet durable for a long show? A: If you want the puppet to last, consider laminating the paper pieces (arms, hat, broom) before gluing them to the bag. You can also stuff the “head” flap lightly with tissue to keep it from flattening out.
Conclusion
This Paper Bag Witch Puppet is more than just a piece of paper; it is a ticket to an afternoon of imagination and laughter. Whether your witch is scary, silly, or stylish, the process of making her creates memories that last longer than the candy corn.
So, grab your glue sticks and your creativity, and get ready to cast a spell of fun this Halloween. Once you have made the witch, why not make her some friends? A paper bag Frankenstein, ghost, or vampire would make the perfect cast for your spooky spectacula