As the winter frost begins to settle and the calendar turns to December, the magic of the holiday season truly takes over. For families and educators, this is the perfect time to engage children in festive activities that spark the imagination. One of the most iconic symbols of this season is the reindeer—Santa’s faithful companions on his journey across the globe.
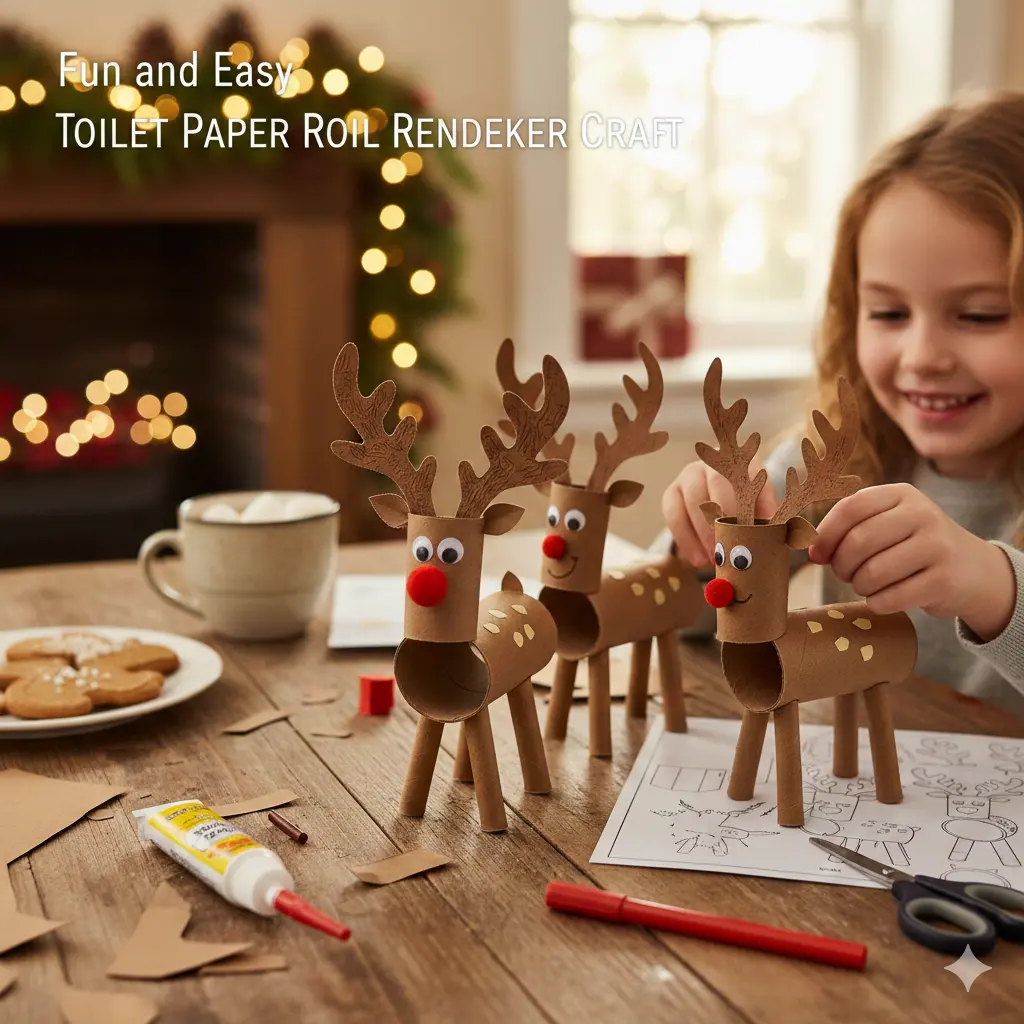
While we see reindeer on wrapping paper, in movies, and as lawn decorations, these fascinating creatures are actually real-world wonders adapted for some of the harshest environments on Earth. Today, we’re combining a bit of holiday magic with a sustainable, eco-friendly project: the Toilet Paper Roll Reindeer Craft. This activity is not only budget-friendly but also a fantastic way to teach kids about upcycling.
The Magic of Reindeer: Did You Know?
Before we dive into the glue and glitter, let’s take a moment to appreciate the animal behind the craft. Reindeer (also known as caribou in North America) are members of the deer family, but they are uniquely adapted for life in the Arctic regions of Canada, Alaska, Russia, and Scandinavia.
Here are a few “cool” facts to share with the kids while you work:
- Unique Antlers: Reindeer are the only deer species where both males and females grow antlers!
- Super Noses: Their noses are specially designed to warm up the freezing air before it reaches their lungs.
- UV Vision: They can see ultraviolet light, which helps them spot food and predators in the blinding white snow.
- Clicking Hooves: When they walk, their tendons make a clicking sound. This helps the herd stay together even during a thick snowstorm.
Why Choose This Craft?
In a world of expensive plastic toys, there is something deeply rewarding about taking a “scrap” item—like an empty toilet paper roll—and transforming it into a piece of art.
Developmental Benefits for Kids:
- Fine Motor Skills: Cutting out the template shapes and gluing small pieces like the “spots” helps develop hand-eye coordination.
- Sustainability: It introduces the concept of recycling and “re-purposing” household waste into something beautiful.
- Creative Expression: While we provide a template, kids can choose to make “Rudolph” with a red nose or “Sven” with a brown one, adding their own unique personality to each reindeer.
Supplies You’ll Need
One of the best parts of this craft is that you likely already have everything you need in your kitchen or craft drawer.
- Empty Toilet Paper Rolls (one for each reindeer you want to make).
- The Reindeer Craft Template (includes the body, face, ears, antlers, and spots).
- Construction Paper or Cardstock (Brown, dark brown, and white).
- Glue Stick or School Glue.
- Scissors (safety scissors for the little ones).
- Markers or Crayons (to add a smile or extra details).
- Optional: Red pom-poms for a 3D “Rudolph” nose or googly eyes for extra character.
Step-by-Step Instructions
Follow these simple steps to bring your reindeer herd to life.
Step 1: Prepare Your Template
Download and print the reindeer craft template. The template is designed to be user-friendly, featuring all the necessary components: the rectangular body wrap, the head, two antlers, two ears, and several small spots for the back.
Step 2: Trace and Cut
The largest piece of the template is the body outline. Use this as a stencil.
- Place the body stencil over a piece of brown construction paper, trace it, and cut it out.
- Next, cut out the antlers (using a darker brown) and the face.
- Pro Tip: If you want a more colorful herd, you can even use patterned paper or let the kids paint the toilet paper rolls directly!
Step 3: Wrap the Body
Apply glue to the back of your large brown rectangular piece. Carefully wrap it around the toilet paper roll, smoothing out any bubbles. This provides a clean, uniform base for your reindeer’s “fur.”
Step 4: Assemble the Face
Before attaching the head to the roll, it’s easier to add the details first.
- Glue the antlers to the back of the head.
- Attach the ears just below the antlers.
- If you’re using the paper eyes from the template, glue them on now. Otherwise, stick on your googly eyes.
- Don’t forget the nose! Glue on a red circle (for Rudolph) or a black/brown one for the rest of the team.
Step 5: Put It All Together
Apply a generous amount of glue to the upper front portion of the toilet paper roll and press the assembled head onto it. Hold it for a few seconds to ensure it sticks. Finally, glue the small “spots” onto the back of the roll to give your reindeer that authentic woodland look.
Creative Variations to Try
Once you’ve mastered the basic reindeer, why not expand the project?
- The Full Sleigh Team: Encourage the kids to make all nine reindeer (Dasher, Dancer, Prancer, Vixen, Comet, Cupid, Donner, Blitzen, and Rudolph). You can write their names on the rolls with a gold marker.
- Nature-Inspired Antlers: Instead of using the paper antlers from the template, go for a walk outside and find small, Y-shaped twigs. Tape or glue these inside the roll for a rustic, 3D effect.
- Reindeer Ornaments: Punch a hole in the back of the roll and thread a piece of ribbon through it. Now your craft can hang proudly on the Christmas tree!
Making Memories This Holiday Season
Crafting is about more than just the end product; it’s about the time spent together. As you sit at the table with the scent of cinnamon or pine in the air, you’re creating memories that last much longer than the paper and glue. This Toilet Paper Roll Reindeer Craft is a simple, screen-free way to lean into the holiday spirit while teaching children the value of creativity and nature.