Inspired by I Heart Crafty Things This craft is perfect for teaching kids about recycling while creating something vibrant. Supplies Needed: Old newspaper Watercolors or tempera paints (Rainbow colors) Cardstock (Black for the background, white and yellow for eyes/beak) Scissors and Glue Quick Steps: Paint the News: Have the kids paint large sections of newspaper in various bright colors. Let it dry completely. Cut the Feathers: Cut the painted newspaper into semi-circles or "u" shapes to act as feathers. Build the Body: Cut a large oval out of plain newspaper for the body and layer the colorful "feathers" from the bottom up. Add the Wise Eyes: Owls are known for those huge eyes! Cut two large white circles and two smaller black circles. Glue them near the top. The Beak: A small orange or yellow triangle completes the face. 💡 Did You Know? (Owl Edition) While the kids are crafting, you can drop these fun facts to answer those "mysterious" owl questions: Are they really wise? In mythology, yes! But in reality, they aren't necessarily smarter than other birds. They are just very patient hunters. What do they see at night? Their eyes are shaped like tubes (not spheres), which act like binoculars. They can't move their eyes, which is why they have to turn their entire heads! Silent Flight: Owl feathers have special "fringes" that muffle the sound of air passing through, making them nearly silent when they fly.
education

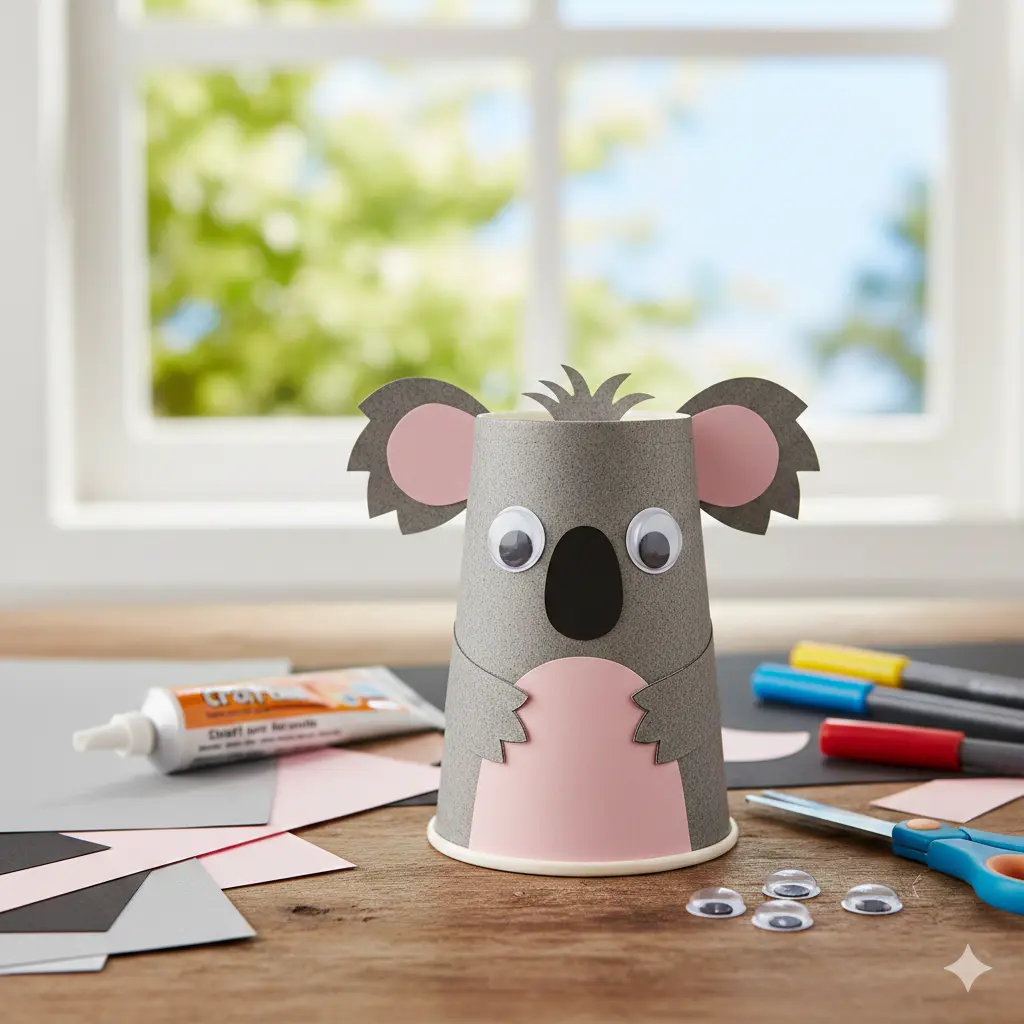
How to Make the Paper Cup Koala Craft

1. Prepare the Template Download and print the template. Trace the body, hair tuft, outer ears, and arms onto grey or brown cardstock. Trace the inner ears and belly onto light pink paper, and the nose onto black paper. Cut all pieces out. 2. Wrap the Cup Apply craft glue to your large rectangular “body” […]

How to Make the DIY Felt Cat Plushie
education

How to Make the DIY Felt Cat Plushie

This project is a fantastic introduction to basic sewing. It’s small, manageable, and yields a professional-looking result that makes for a perfect keychain, ornament, or pocket pal. 1. Trace and Cut Your Pattern Download the Free Cat Plushie Template. Use a fabric marker or a soft pencil to trace the shapes onto your felt. Pro

This craft is as much about the process as it is about the final result. The tactile sensation of the paper helps kids stay focused while they work on those important motor skills. 1. Prepare Your Base Start by downloading and printing the Crumpled Paper Hedgehog Template. Trace the body, feet, and ear onto your light brown craft paper. Trace the large oval "spine area" onto the dark brown paper and the small nose onto the black paper. 2. Assemble the Hedgehog Body Glue the feet to the bottom of the light brown body. Then, layer the dark brown "spine area" onto the back of the hedgehog. This creates the foundation for where all that textured "fur" will go. Glue the little black nose at the tip of the snout and add a googly eye (or draw one with your marker) just above it. 3. The Main Event: Crumpling the Spines Now for the fun part! Take your brown tissue paper and tear it into small squares (about 2-3 inches). The Technique: Show your child how to use their palms and fingers to scrunch each square into a tight little ball. The Benefit: This is the part that really builds those palmar arches and pincer grasps you mentioned earlier. 4. Giving the Hedgehog its Spines Apply a generous amount of craft glue to the dark brown section of the body. Have your child press the crumpled tissue paper balls onto the glue one by one. Encourage them to pack the balls closely together—the denser the paper, the "spikier" and more realistic the hedgehog will look! 5. Add Personality Use your Sharpies or markers to add a little smile or some rosy cheeks. You can even use different shades of tissue paper (tan, dark brown, or even orange) to give the hedgehog a more autumnal, multi-dimensional look. Why Sensory Crafts are Essential for Development A craft like this isn't just a "time-filler." In a world dominated by screens and smooth glass surfaces, providing children with tactile, sensory experiences is vital. When a child crumples paper, they are learning about resistance, volume, and texture. This "hand-brain" connection is the secret sauce for early childhood education. Plus, the end result is a cute, 3D friend they can be proud of! Tips for SEO & AdSense Approval Use Alt-Text: When you upload images of this craft to your site, make sure the alt-text is descriptive, like "Crumpled paper hedgehog craft for toddlers fine motor skills." Internal Linking: Since you have several craft posts, link this hedgehog craft to other "animal crafts" or "fine motor activities" on your site to keep readers (and crawlers) moving through your content.
education

How to Make the 3D Popup Card for Lohri

Follow these simple steps to create a vibrant, festive card that captures the warmth of a traditional Lohri night. 1. Prepare Your Base and Elements First, download and print your Sankranti Lohri Pongal Coloring Sheets. While these sets often cover multiple winter harvest festivals, focus on the bonfire and dancing figures (usually found on page

Handprint Grinch Craft
education

Handprint Grinch Craft

1. The Green Handprint Paint your child’s hand with bright green washable paint. Press it firmly onto a piece of white cardstock or construction paper with the fingers pointing downward. Why? The fingers will become the Grinch’s shaggy fur and neck, while the palm area will be his face! 2. Add the Santa Hat Once

Scroll to Top