Imagine the sun beating down on a hot summer afternoon. The air is thick, the cicadas are buzzing, and the only thing on everyone’s mind is a cold, sweet treat. Ice cream is the ultimate symbol of summer joy, but we all know the tragedy of a scoop melting faster than you can eat it!
Today, we have the perfect solution. We are going to create a Handprint Ice Cream Craft that captures all the sweetness of your favorite dessert without the sticky mess. This is a wonderful activity for preschoolers, kindergarteners, and even older kids who want to preserve a little piece of their childhood summer.
Not only is this craft adorable, but it also serves as a sentimental keepsake. Those little handprints won’t stay little forever, and turning them into a colorful ice cream scoop is a memory you can cherish for years to come.
A Scoop of History: The Accidental Invention of the Cone
Before we dive into the glue and paper, let’s set the stage with a little story you can tell your kids while you craft. Did you know that the ice cream cone might have been a happy accident?
Picture yourself at the 1904 St. Louis World’s Fair. It was a bustling, crowded event. One vendor was selling ice cream in cups, and business was booming—so much so that he ran out of cups! Panic set in. There was a long line of hungry customers waiting.
Luckily, his neighbor was a Syrian baker named Ernest A. Hamwi, who was selling a waffle-like pastry called zalabia. Seeing his neighbor’s distress, Hamwi rolled one of his warm, thin waffles into a cone shape. The ice cream vendor plopped a scoop on top, and voilà! The waffle cone was born.
While historians debate the exact origin, this story teaches us a great lesson about creativity and improvisation. Today, we are going to channel that same creative spirit to make our own masterpiece!
Why This Craft is Perfect for Child Development
Crafting isn’t just about keeping kids busy; it’s a vital part of their development. Here is why this specific project is a winner:
- Fine Motor Skills: Tracing hands, cutting out complex shapes, and picking up tiny paper “sprinkles” are excellent exercises for strengthening hand muscles and coordination.
- Self-Expression: Kids get to choose their “flavor” (color) and toppings, allowing them to express their preferences and artistic style.
- Sensory Processing: Working with different textures—smooth paper, sticky glue, perhaps even adding cotton balls or glitter—engages the senses.
- Emotional Bonding: “Handprint” crafts provide a sense of identity and belonging. It’s their hand that makes the art special.
Supplies Required
To get started, gather your materials. You likely have most of these lying around your home or classroom.
- Colored Craft Papers or Cardstock: You will need brown or orange for the cone, red for the cherry, and various bright colors for the “ice cream” scoops and sprinkles.
- Pencil: For tracing the hand.
- Scissors: Child-safe scissors for the little ones, and a sharper pair for adults if needed.
- Craft Glue: A glue stick works best for paper-on-paper, but liquid school glue is great if you plan to add heavier toppings like buttons or pom-poms.
- Sharpies or Markers: A brown marker is essential for drawing the waffle pattern.
- Optional Embellishments: Glitter, cotton balls, real sprinkles, or stickers
Step-by-Step Instructions: How to Make the Handprint Ice Cream
Follow these simple steps to create your frozen delight.
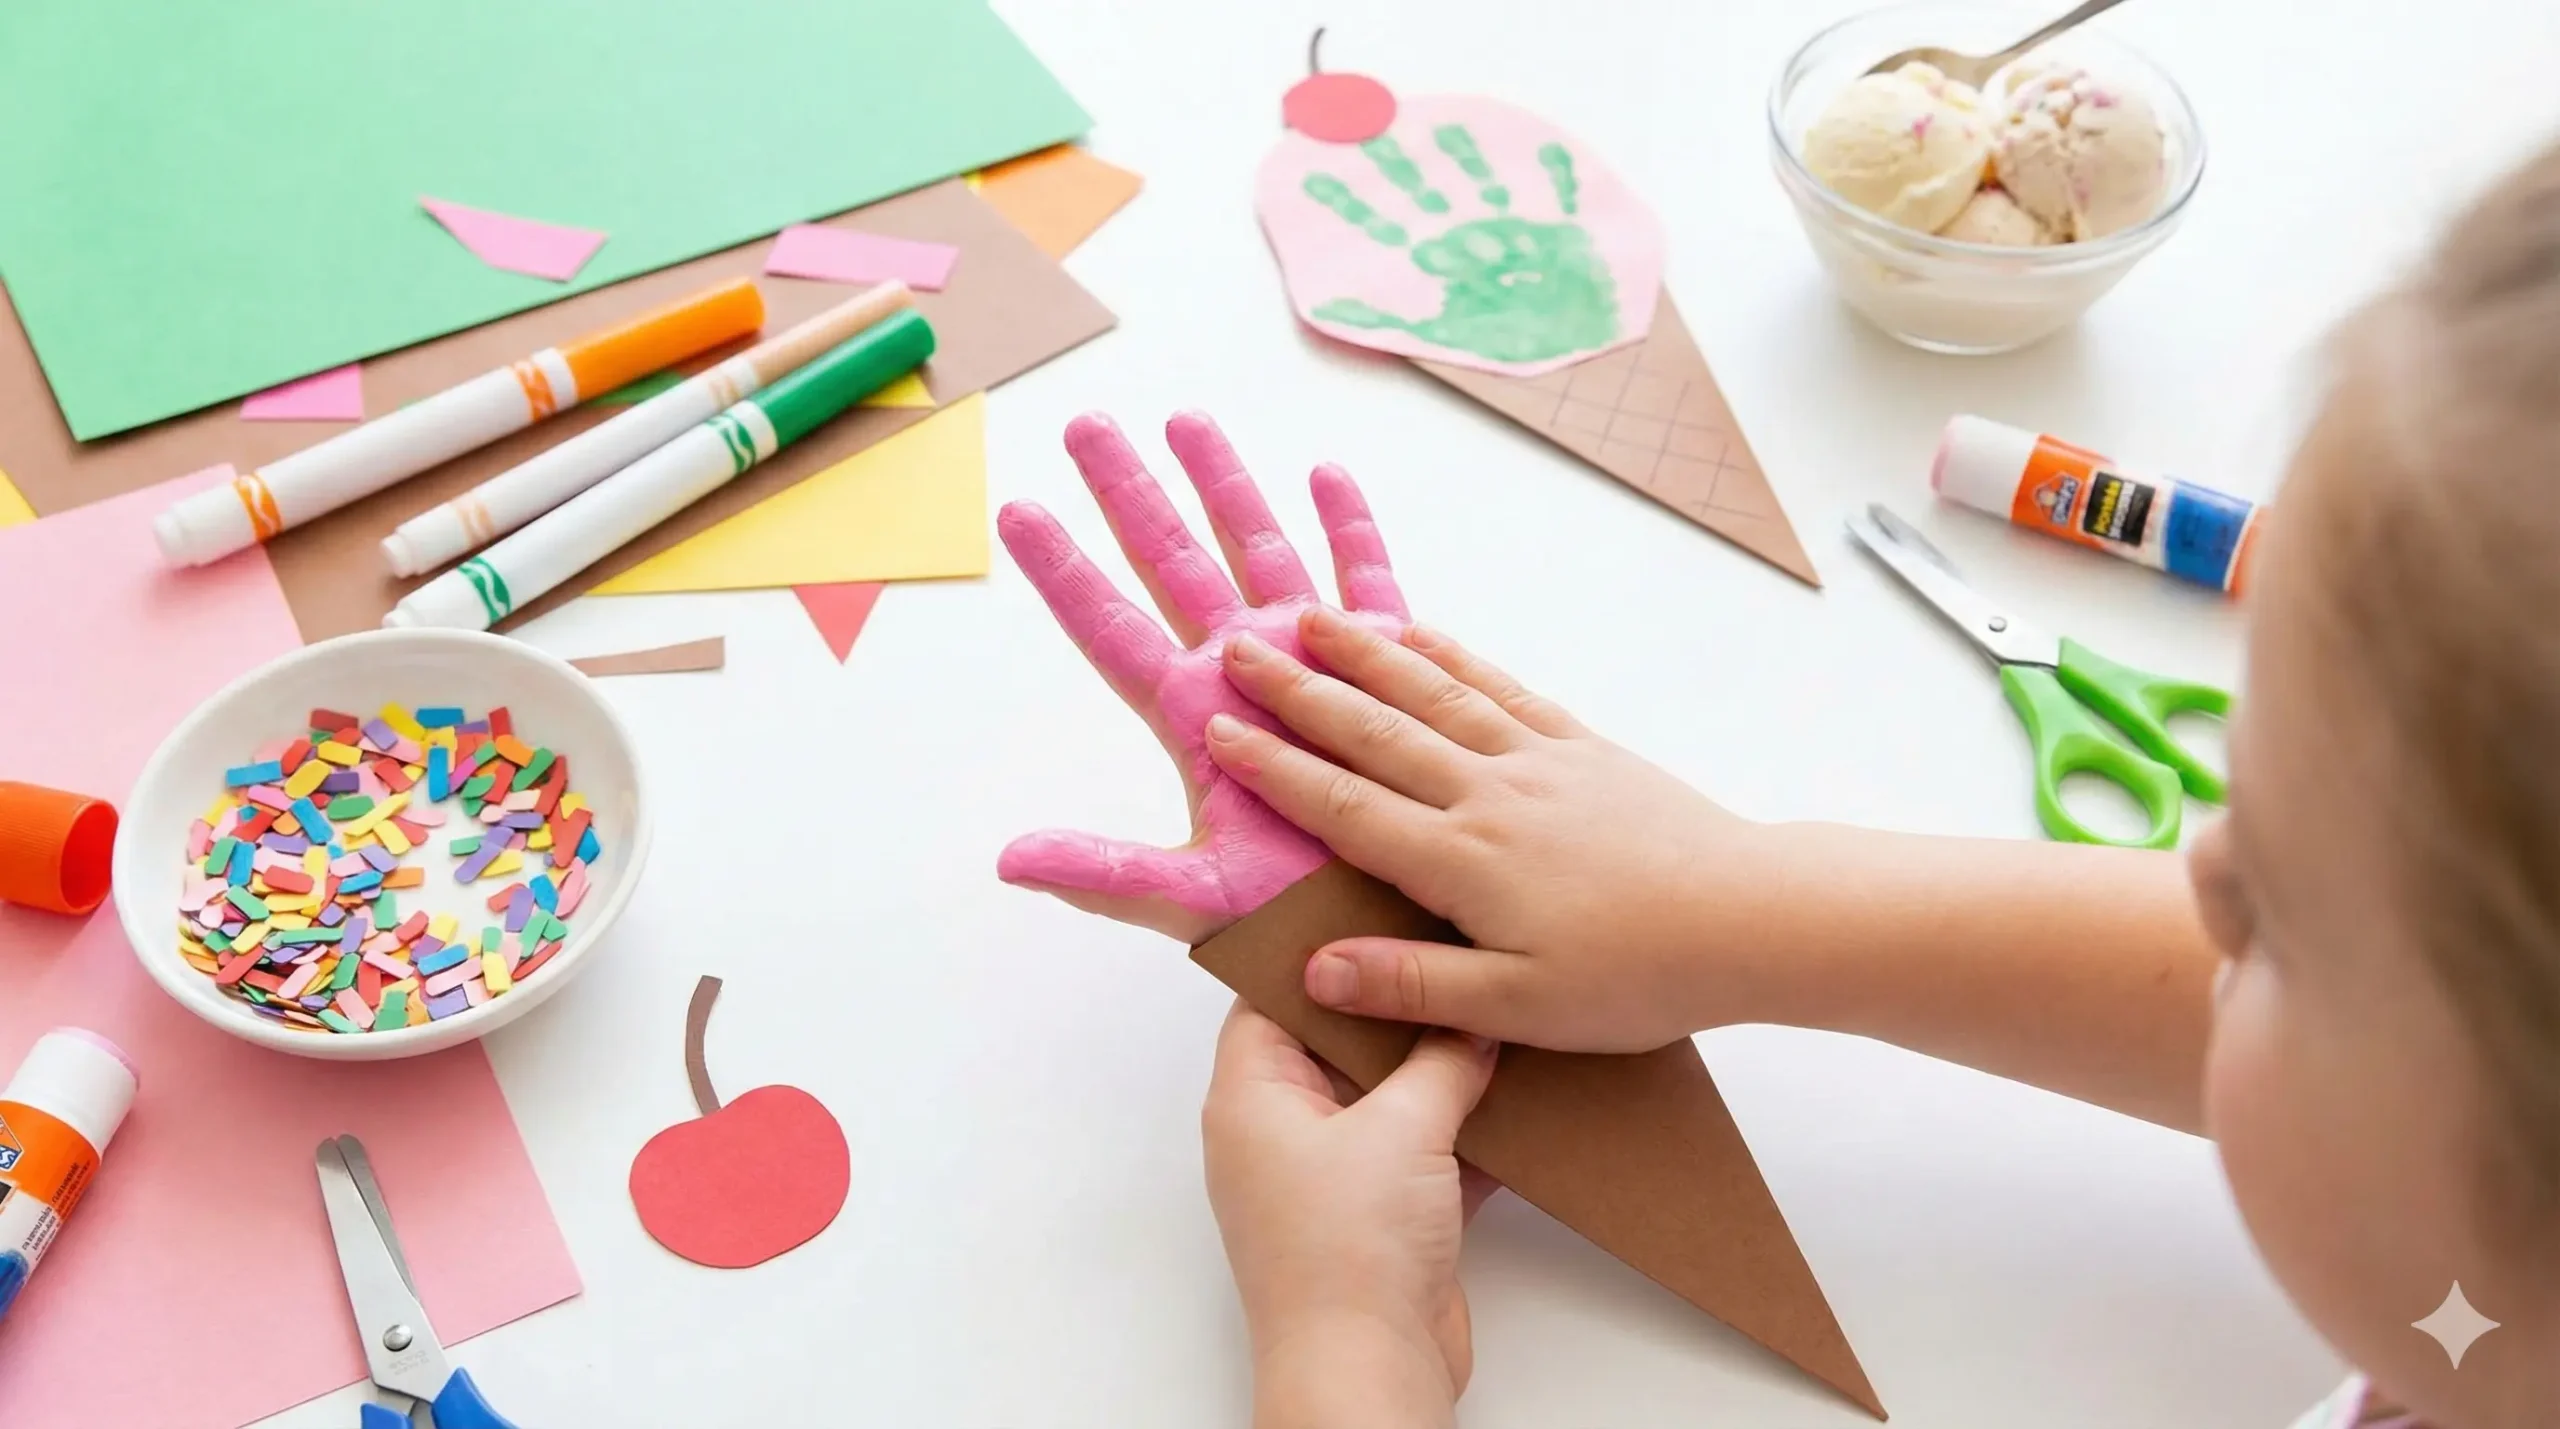
Step 1: Create the “Scoop” (The Handprint)
This is the most personal part of the craft.
- Choose a color of paper that represents your child’s favorite flavor. Is it pink for strawberry? Mint green for pistachio? Brown for chocolate?
- Place the child’s hand flat on the paper. Instruct them to keep their fingers slightly spread out—these will represent the melting drips or the fluffy texture of the ice cream.
- Using a pencil, carefully trace around the hand.
- Cut out the handprint. If your child is very young, you may need to assist with the cutting, especially around the fingers.
Step 2: The Waffle Cone
Now, let’s make the vessel for our ice cream.
- Cut a large triangle out of brown or orange construction paper or cardstock. You can round the corners slightly if you prefer a softer look.
- The Texture: To create that classic waffle look, take your brown Sharpie or marker. Draw diagonal lines across the triangle in one direction. Then, draw diagonal lines in the opposite direction to create a crisscross diamond pattern.
- Tip: Make sure the marker shade is slightly darker than the paper so the lines pop!
Step 3: Assembly Time
Let’s build the ice cream!
- Apply glue to the top edge of your waffle cone (the widest part).
- Press the palm area of the handprint cutout onto the glue. Position it so the fingers are pointing upward to look like a tall scoop, or downward if you want it to look like the ice cream is dripping down the cone. Both look adorable!
- Variation: If you want a double or triple scoop, trace multiple handprints in different colors and stack them on top of each other!
Step 4: The Cherry on Top
No sundae is complete without a cherry.
- Cut a small circle out of red paper.
- Cut a tiny stem out of green or brown paper (or draw it on).
- Glue the stem to the back of the red circle.
- Paste the cherry onto the thumb or the top finger of the handprint.
Step 5: Sprinkle Some Magic
This is where the kids can really let loose.
- Paper Sprinkles: Cut tiny, thin rectangles out of scrap paper in various neon colors.
- Application: Put dots of glue all over the handprint (the ice cream part).
- Stick: Have the kids carefully place the paper sprinkles onto the glue dots.
- Alternative: For a fun sensory twist, you can use actual cake sprinkles! Just make sure to use liquid glue and let it dry flat so they don’t fall off.
Fun Variations to Try
Once you have mastered the basic handprint ice cream, try these creative twists to keep the fun going:
1. The “Melting” Mess Instead of paper sprinkles, use paint! Dip a Q-tip into different colors of paint and dot it over the handprint. This creates a raised texture that looks great.
2. Fluffy Whipped Cream Before adding the cherry, pull apart a cotton ball to make it wispy and glue it to the top of the handprint. It looks exactly like a dollop of whipped cream.
3. The Greeting Card This craft makes an excellent card for birthdays or Father’s Day. Glue the finished ice cream cone onto a folded piece of cardstock. Write a punny message on the inside, such as:
- “You’re the coolest!”
- “Life is sweet with you.”
- “Here’s the scoop: I love you!”
4. Puffy Paint Ice Cream If you want to take the texture to the next level, mix equal parts white school glue and shaving cream with a drop of food coloring. Paint this mixture onto the handprint shape. When it dries, it remains puffy and foam-like!
Fun Ice Cream Facts for Kids
While the glue is drying, keep the conversation going with these cool facts about everyone’s favorite treat:
- Brain Freeze: That headache you get when you eat ice cream too fast has a scientific name: sphenopalatine ganglioneuralgia. Try saying that three times fast!
- The Tallest Cone: The world record for the tallest ice cream cone was over 9 feet tall. That is taller than a basketball player!
- Vanilla Victory: Despite all the crazy flavors out there (like bubblegum and cookie dough), Vanilla is still the most popular flavor in the world.
- A Presidential Treat: George Washington, the first president of the United States, loved ice cream so much that he spent approximately $200 on it during the summer of 1790. In today’s money, that is thousands of dollars!
Conclusion
Summer days are long, but childhood is short. Taking thirty minutes to sit down with your kids and make this Handprint Ice Cream Craft creates a tangible memory of how small their hands once were.
Whether you use it as a refrigerator decoration, a heartfelt greeting card, or just a way to pass a rainy afternoon, this craft is guaranteed to bring smiles. It is low-mess, high-engagement, and ends with a result that looks good enough to eat (but please don’t!).