As soon as the air turns crisp and the first crunchy leaves hit the ground, a familiar excitement fills the air. It’s pumpkin season! From pumpkin spice lattes to jack-o’-lanterns on front porches, this orange gourd is the undisputed king of autumn.
But while carving pumpkins is a classic tradition, let’s be honest—it’s messy, requires sharp tools, and isn’t exactly toddler-friendly. If you are looking for a way to celebrate the season with your little ones without the slimy seeds and knife safety worries, we have the perfect solution.
Enter the Handprint Pumpkin Craft. It is simple, adorable, and doubles as a sentimental keepsake that freezes that tiny hand size in time. Whether you are a parent looking for a rainy day activity or a teacher planning a classroom Thanksgiving project, this craft is a winner.
Below, we dive into the history of pumpkins, the benefits of crafting with kids, and a detailed, step-by-step guide to making this masterpiece.
Why are Pumpkins the Symbol of Thanksgiving?
Before we get the glue sticks out, it’s always fun to turn craft time into a mini history lesson. You might be wondering, how did the humble pumpkin become the mascot of Thanksgiving?
Pumpkins have deep roots in North American history. Long before the pilgrims arrived, Native American tribes were cultivating pumpkins. They were a dietary staple, prepared by roasting over fires, stewing, or drying for winter storage.
When European settlers arrived, they were introduced to this versatile squash. However, the connection to Thanksgiving runs deeper than just food. By the mid-19th century, as cities grew and people moved away from farms, the pumpkin became a nostalgic symbol of farm life and harvest.
During the Civil War era, the pumpkin actually became a symbol of the anti-slavery movement in the North. When Abraham Lincoln declared Thanksgiving a national holiday in 1863, the pumpkin was firmly established as a patriotic, harvest-time icon. Today, we can’t imagine a Thanksgiving table without pumpkin pie!
5 Fun Pumpkin Facts for Kids
Keep the kids entertained while you set up the supplies by sharing these fun trivia bits:
- Fruit or Veggie? Scientifically, a pumpkin is a fruit because it has seeds inside! However, in the kitchen, we treat it like a vegetable.
- Giant Gourds: The heaviest pumpkin ever grown weighed over 2,600 pounds—that’s as heavy as a small car!
- Name Origin: The word “pumpkin” comes from the Greek word pepon, which means “large melon.”
- Every Continent: Pumpkins are grown on every single continent in the world, except for Antarctica (it’s too cold there!).
- Flower Power: Pumpkin plants grow beautiful yellow flowers that are actually edible and delicious when fried.
Why Handprint Crafts are Important
You might think this is just a cute paper project, but handprint crafts offer significant developmental benefits for children:
- Fine Motor Skills: Tracing, cutting (for older kids), and gluing help strengthen the small muscles in the hand and improve hand-eye coordination.
- Sensory Experience: Touching different textures (paper, glue, markers) helps with sensory processing.
- Identity & Self-Esteem: Kids love seeing a part of themselves in the art. Seeing the outline of their own hand integrated into the pumpkin gives them a sense of ownership and pride.
- The Keepsake Factor: For parents, handprint crafts are gold. They serve as a time capsule, reminding you years later just how small your child once was.
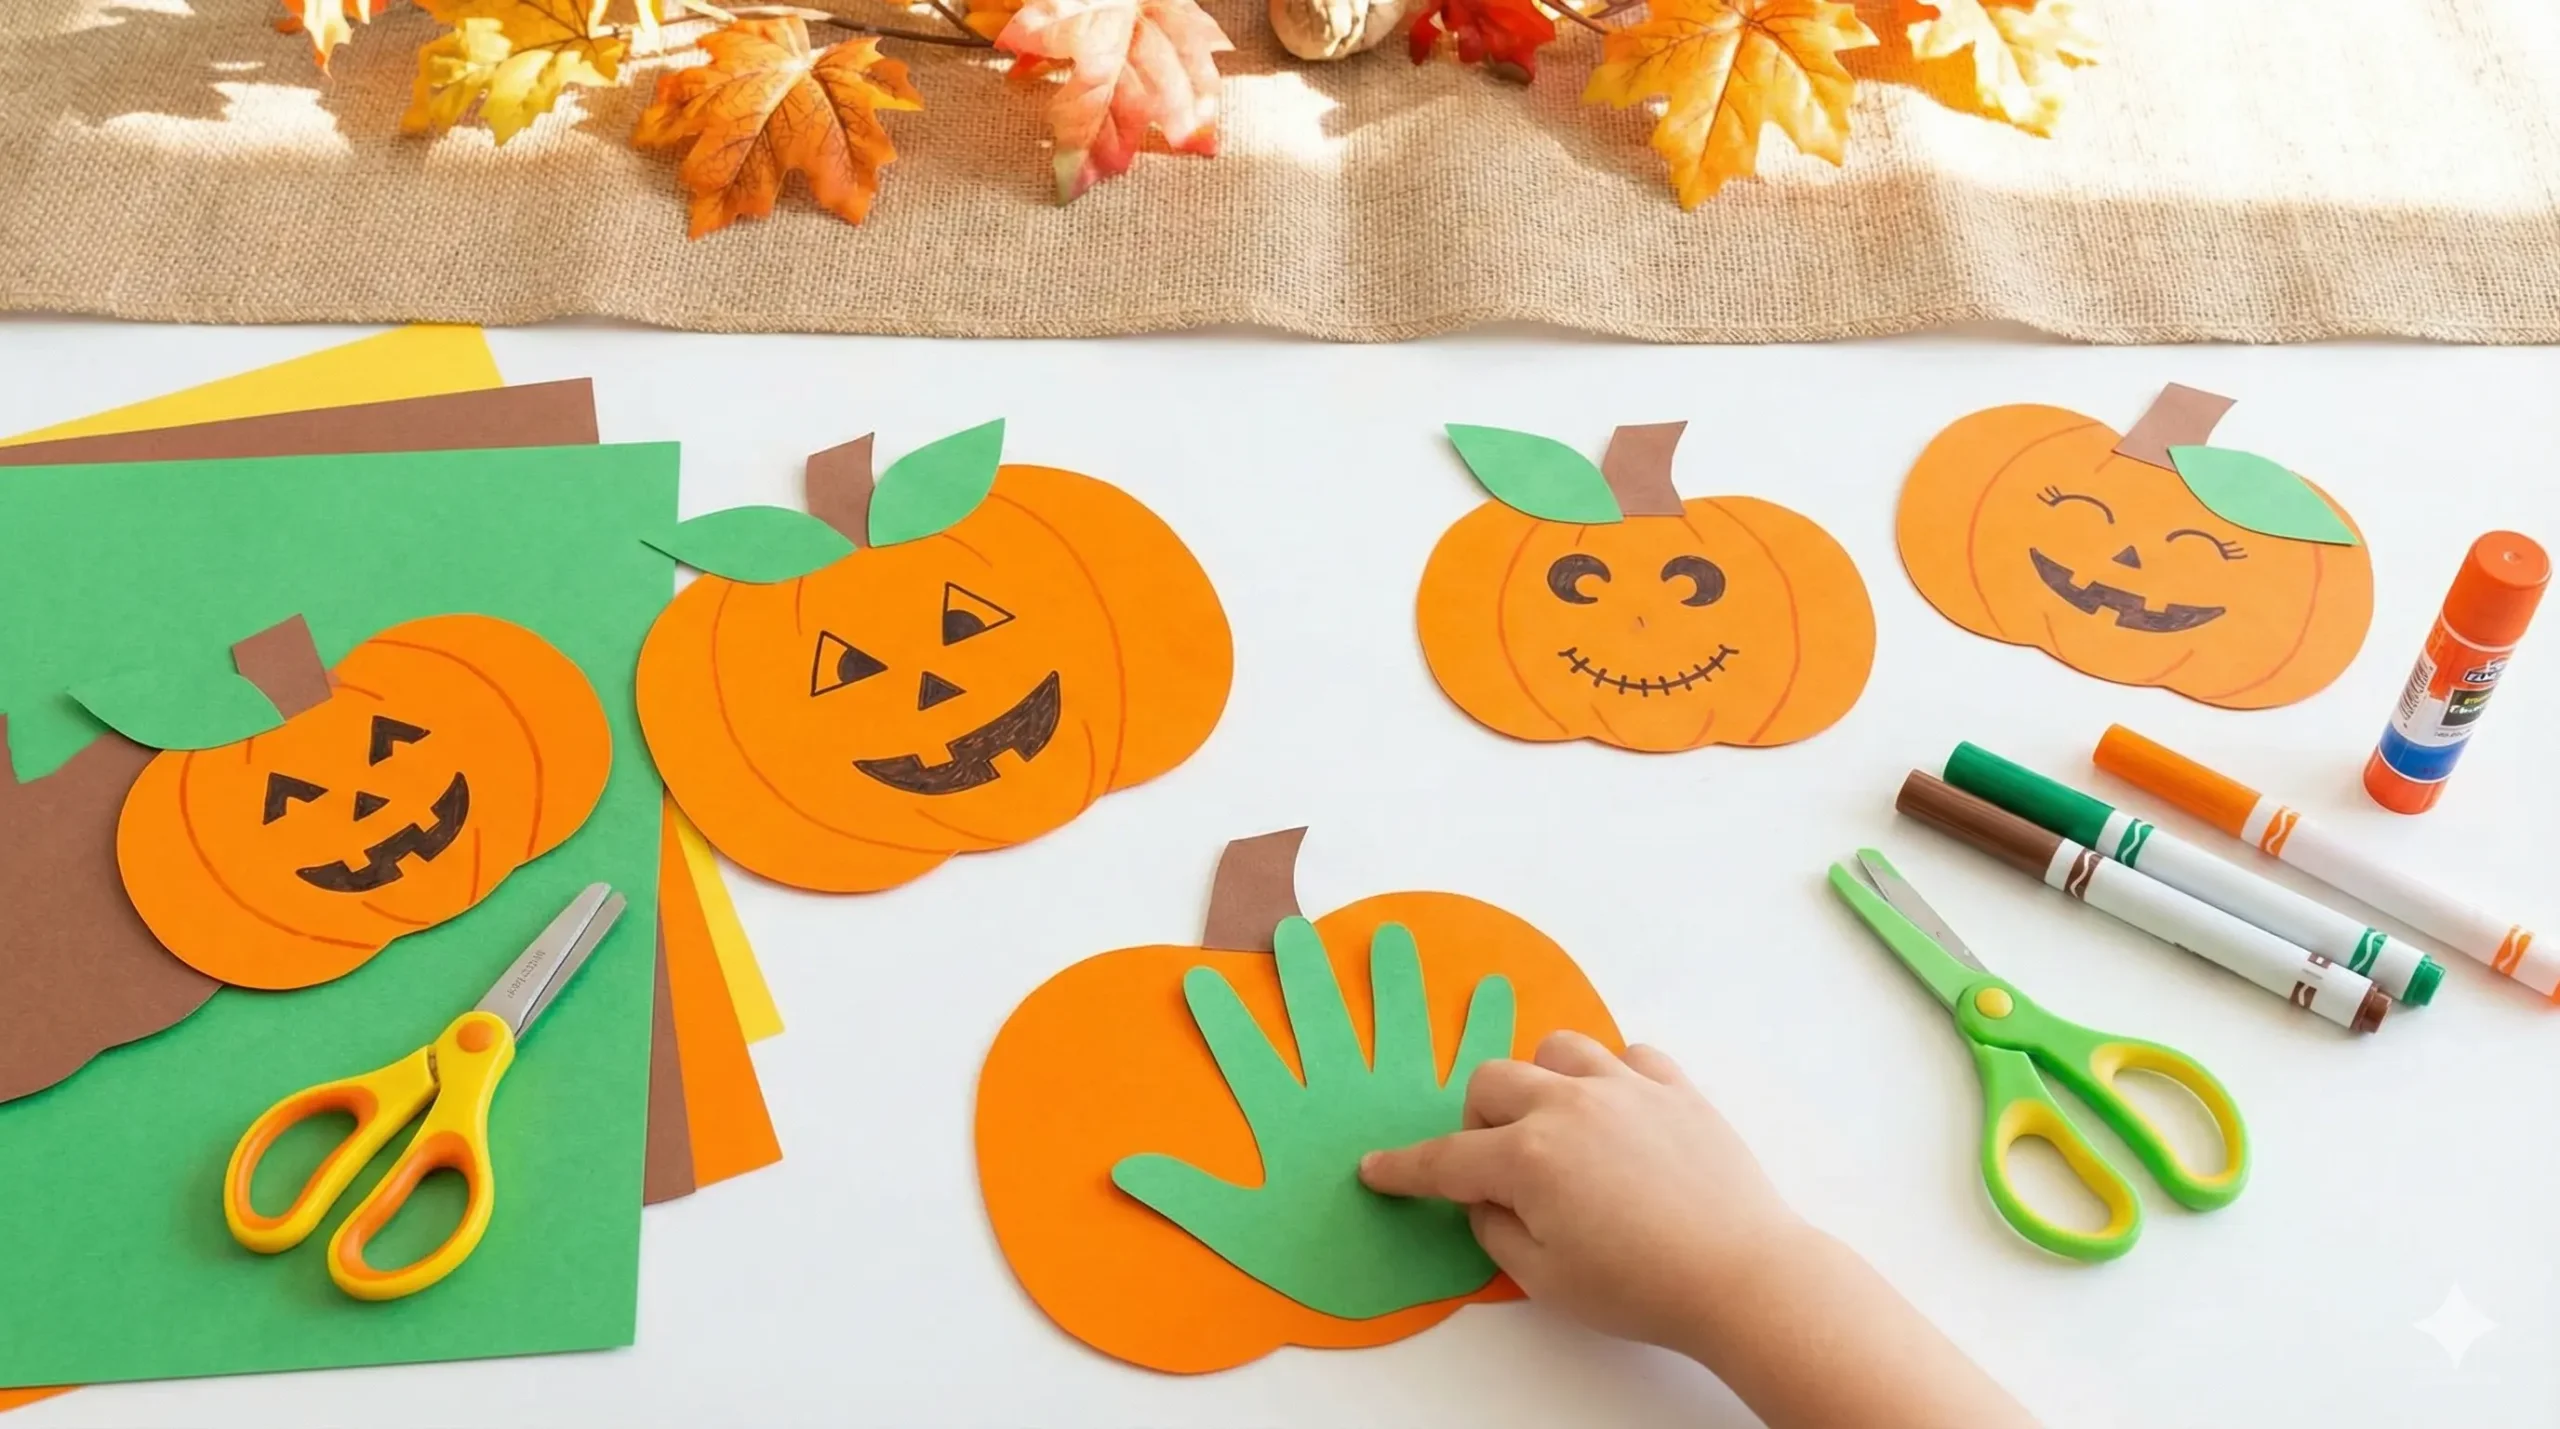
The Ultimate Handprint Pumpkin Tutorial
This version of the craft uses colored paper, meaning it is mess-free (no wet paint involved!). It’s perfect for a quick setup and cleanup.
Supplies Required:
- Colored Craft Paper or Cardstock: You will need Orange (for the body), Green (for the handprint/leaf), Brown (for the stem), and Pink (for cheeks).
- A Pencil: For tracing.
- Scissors: Child-safe scissors if the kids are cutting; sharp scissors for adults.
- Craft Glue: Glue sticks work best for paper, but white school glue is fine too.
- Sharpies or Markers: Black for the eyes/mouth, and a darker Orange for shading.
- Optional: Googly eyes (if you don’t want to draw them).
Step-by-Step Instructions
Step 1: Trace the Handprint
This is the most important part! Take a piece of green craft paper. Have your child place their hand flat on the paper with their fingers spread out slightly. Using a pencil, gently trace around their hand.
- Tip: If your child is ticklish or wiggly, do this step first before they lose interest! This green handprint will serve as the “leaves” or “vines” sitting on top of the pumpkin.
Step 2: Create the Pumpkin Parts
You can either draw a pumpkin shape freehand or find a simple template online.
- The Body: Draw a large, round, slightly squat oval on orange paper.
- The Stem: Draw a thick trapezoid shape on brown paper.
- The Vines: Cut a thin, curly strip of green paper (or curl a straight strip by wrapping it around a pencil).
- The Face: Cut two small white circles for eyes and two small pink ovals for cheeks.
Step 3: Cut Out the Pieces
If your child is practicing scissor skills, let them cut out the large orange pumpkin shape. The fingers on the handprint might be tricky, so an adult may need to help with the detailed cutting there to ensure the fingers don’t get chopped off!
Step 4: Add Detail and Texture
Before gluing, let’s make the pumpkin look realistic. Take an orange marker that is slightly darker than your paper. Draw curved vertical lines on the pumpkin body, starting from the top and curving down to the bottom. This mimics the natural “ribs” of a real pumpkin.
Step 5: Assemble the Pumpkin
Now, let’s put it all together:
- Glue the brown stem to the top center of the orange pumpkin.
- Glue the green handprint right over the stem. Position it so the palm is at the top of the pumpkin and the fingers are pointing upward and outward, looking like the leafy vines of the plant.
- Add the curly green vine strip near the stem for extra flair.
Step 6: Bring it to Life!
It’s time to give your pumpkin a personality.
- Glue the white eye circles in the center. Use a black marker to draw pupils (looking left, right, or crossed for a silly look).
- Glue the pink cheeks below the eyes.
- Draw a mouth. You can do a simple smile, a jagged “Jack-o’-Lantern” mouth, or a surprised “O” shape.
3 Creative Variations to Try
Once you have mastered the basic paper craft, try these twists to keep the creativity flowing:
1. The “Thankful” Pumpkin
Turn this into a gratitude exercise for Thanksgiving dinner. On each finger of the green handprint leaf, have your child write (or dictate to you) something they are thankful for (e.g., “My Dog,” “Grandma,” “Pizza”). It makes for a beautiful centerpiece.
2. The Paint Version (Sensory Play)
If you don’t mind a little mess, skip the paper tracing.
- Paint your child’s palm orange.
- Stamp it onto white paper.
- Once dry, the palm becomes the pumpkin body, and the fingers are the bottom ridges. You can paint a green stem on top afterward.
3. The Texture Pumpkin
Instead of drawing the ribs with a marker, cut strips of orange tissue paper. Have the child crumple them up and glue them onto the pumpkin base. This creates a fluffy, 3D texture that looks great hanging on a wall.
Display Ideas: What to Do With Your Masterpiece?
Don’t let these cute pumpkins hide in a drawer! Here are fun ways to display them:
- Thanksgiving Place Cards: Write the name of a guest on the pumpkin’s belly and place one on each plate at Thanksgiving dinner. Grandparents will love taking them home.
- Front Door Garland: Make 5 or 6 pumpkins and string them together with twine. Hang it across your front door or fireplace mantel.
- Greeting Cards: Glue the finished pumpkin onto a folded piece of cardstock. Write “Happy Fall!” inside and mail it to distant relatives.
Conclusion
Crafting with kids doesn’t have to be complicated or expensive. This handprint pumpkin craft captures the spirit of the season, honors the history of the harvest, and leaves you with a precious memory of your child’s growing hands.