Are you looking for a creative way to spend your afternoon? Whether you’re a seasoned crafter or picking up a sculpting tool for the first time, making an adorable clay pig is a rewarding project. Not only do you get a cute new “desk buddy,” but you also get to work with foam clay—one of the most tactile and satisfying materials in the crafting world.
In this comprehensive guide, we’ll walk you through the step-by-step process of creating your porcine friend, dive into the fascinating history of National Pig Day, and even debunk a few common myths about our oinking companions.
Why Choose Foam Clay for Your Pig Craft?
Before we dig into the “mud,” let’s talk about the medium. Foam clay is a lightweight, air-dry material that is incredibly popular for beginner projects. Unlike traditional ceramic clay, it doesn’t require a kiln, and unlike polymer clay, it doesn’t need to be baked in an oven.
- No Mess: It doesn’t stick to your hands or leave a residue on your table.
- Vibrant Colors: Foam clay comes in bright, pre-mixed shades.
- Texture: It has a unique, squishy texture that dries into a firm, foam-like finish.
Essential Supplies You’ll Need
To ensure your clay pig looks professional and stays sturdy, gather the following materials:
- Foam Clay: You will need two shades of pink (a light “bubblegum” pink for the body and a darker “magenta” pink for accents). You’ll also need small amounts of black and white for the eyes.
- Sculpting Tools: A plastic needle tool (for nostrils) and a flat-edged tool (for smoothing seams).
- Clean Workspace: A silicone mat or a piece of parchment paper works best to prevent sticking.
- Reference Image: Keep a picture of a cartoon pig nearby to help with proportions.
The Fascinating Truth: Do Pigs Actually Sweat?
You’ve likely heard someone say they are “sweating like a pig” after a long run or a hot day. It’s a common idiom, but biologically speaking, it’s completely inaccurate!
The Science of Porcine Cooling
Pigs actually have very few functional sweat glands. Because they cannot perspire to regulate their body temperature like humans or horses do, they have to find other ways to stay cool. This is the real reason you see pigs wallowing in mud.
The mud acts as a natural “evaporative cooler.” As the water in the mud evaporates from their skin, it carries away heat. Additionally, the mud serves as a sunscreen, protecting their sensitive skin from harsh UV rays. So, the next time you see a pig in a puddle, remember: they aren’t being “dirty”—they’re being smart!
Where Did the Phrase Come From?
If pigs don’t sweat, why do we say it? The phrase actually refers to “pig iron,” a type of crude iron. When the liquid iron is poured into molds, it needs to cool before it can be moved. As it cools, the moisture in the air condenses on the surface of the metal, making it look like it’s “sweating.” When the “pig” sweats, the ironworkers know it’s cool enough to handle!
Step-by-Step Tutorial: Creating Your Clay Pig
Now that we’ve cleared up the science, let’s get to the art! Follow these steps to bring your pink companion to life.
Step 1: Preparing the Base Shapes
Start by dividing your light pink clay into sections. You will need:
- One large ball (the body)
- One medium ball (the head)
- Four small, equal-sized balls (the legs)
- Two tiny triangles (the ears)
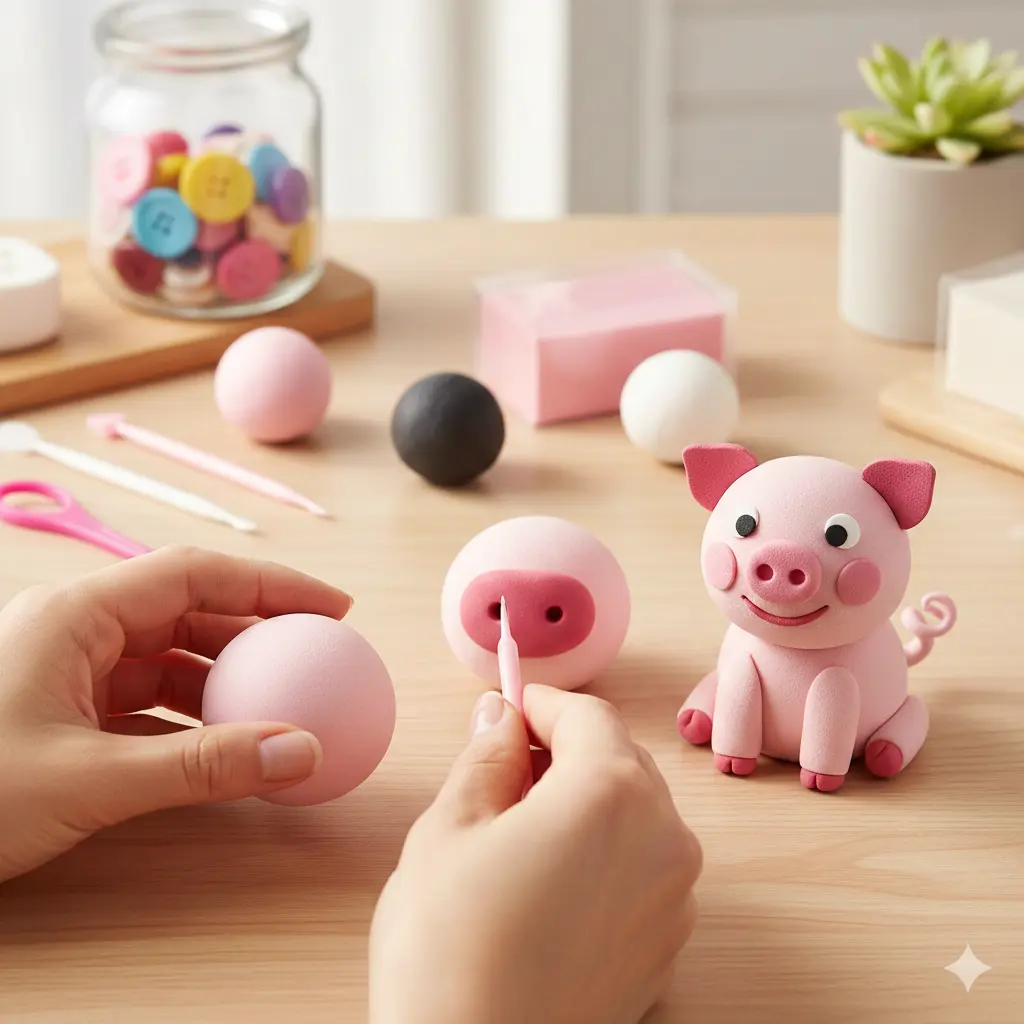
Step 2: Sculpting the Body and Head
Take the large ball of light pink clay and roll it between your palms until it is perfectly smooth. Gently press it onto your workspace to give it a slightly flat bottom—this ensures your pig doesn’t roll off the shelf!
Next, take the medium ball for the head. Use your thumb to create a slight indentation where the neck will meet the body. Join the head to the body by pressing them together firmly. Foam clay is usually “self-adhesive” when wet, so you shouldn’t need glue.
Step 3: Crafting the Iconic Snout
This is where the dark pink clay comes in. Roll a small oval of dark pink clay and flatten it slightly. Press this onto the center of the face.
Pro Tip: Use your sculpting tool or the end of a paintbrush to poke two small holes into the dark pink oval. These are the nostrils, and they immediately give your craft that “piggy” look!
Step 4: Adding the Ears and Limbs
For the ears, take your two light pink triangles. Take two even smaller pieces of dark pink clay, flatten them, and place them inside the triangles. This creates the “inner ear” look. Attach the ears to the top of the head, folding the tips forward slightly for a “floppy” effect.
For the legs, take your four small balls and roll them into short cylinders. Attach them to the four corners of the bottom of the body. Make sure they are level so your pig stands upright.
Step 5: The Finishing Touches (Eyes and Tail)
Roll two tiny dots of white clay for the eyes, and even smaller dots of black for the pupils. Place them just above the snout. Finally, take a tiny “snake” of light pink clay and curl it into a spiral to create the classic curly tail!
Celebrating National Pig Day
Did you know that March 1st is National Pig Day? Established in 1972, this holiday was created to accord the pig its “rightful, though generally unrecognized, place as one of man’s most intellectual and domesticated animals.”
Pigs are incredibly social and intelligent creatures. Studies have shown they are smarter than dogs and can even solve puzzles! Celebrating with a craft is a great way to teach children (and adults!) about animal welfare and the importance of these farm animals in our ecosystem.
Maintenance and Care for Your Clay Pig
Once your pig is finished, it needs time to set.
- Drying Time: Let your pig air-dry for at least 24 to 48 hours. Avoid touching it during this time, as foam clay can easily take on fingerprints while wet.
- Storage: Keep your finished pig in a dry area. Since foam clay is porous, it doesn’t do well with water.
- Display: These make excellent additions to tiered trays, bookshelves, or as a handmade gift for a friend.
Frequently Asked Questions (FAQs)
What if my clay starts to dry out while I’m working?
If your foam clay feels a bit stiff, you can add one or two drops of water and knead it back to a soft consistency. However, don’t over-saturate it, or it will become sticky.
Can I use this tutorial for polymer clay?
Absolutely! The shapes and steps are the same. Just remember that if you use polymer clay, you will need to bake it according to the package instructions (usually around 275°F / 135°C).
How do I get the “curly” tail to stay?
The trick is to roll the clay very thin and wrap it around a toothpick. Let it sit for a minute to hold the shape before gently sliding it off and attaching it to the pig’s backside.
Final Thoughts
Creating a clay pig is more than just a craft; it’s a way to engage with nature, learn some trivia, and de-stress with a hands-on activity. Whether you’re making a whole “drove” of pigs or just one little friend, the most important part is to have fun with the process.